



Course Planning in Stellic

Tools & Resources
Course Planning in Stellic
View this brief tutorial video to learn more about the Stellic Scheduler.

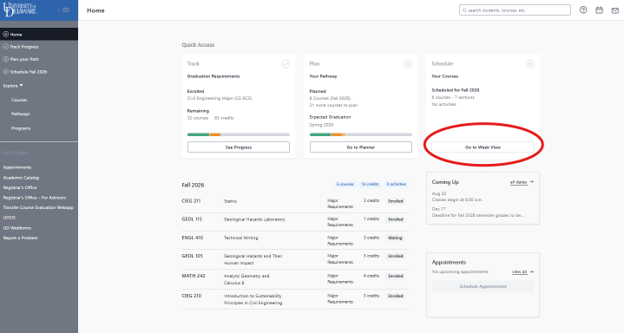
On the Home page, you can also access the Scheduler by clicking the “Go to Week View” button under Schedule for the term you desire.
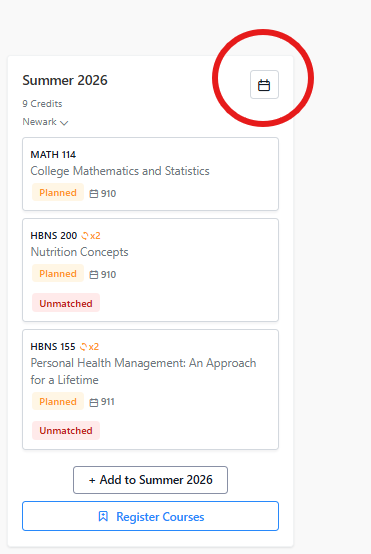
Alternatively, from the Stellic Planner, select calendar button next to the term you are planning for.
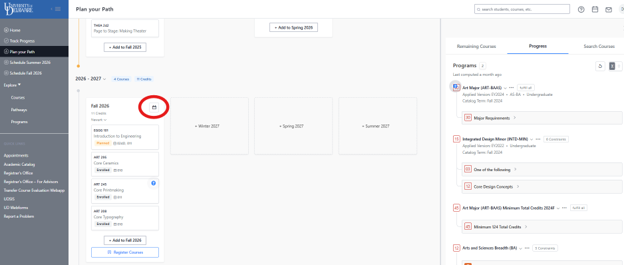
The planning tool will open for the selected term.
*Terms become available two weeks prior to registration beginning for the term. The start of registration for each term is posted on the Academic Calendar.
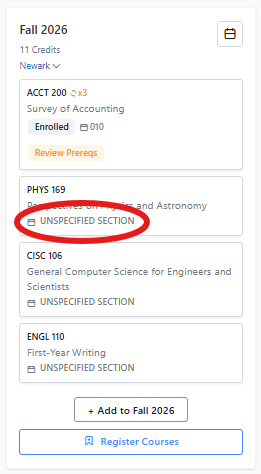
From the planner, on the term you are planning for, select “Unspecified Section” under each course.
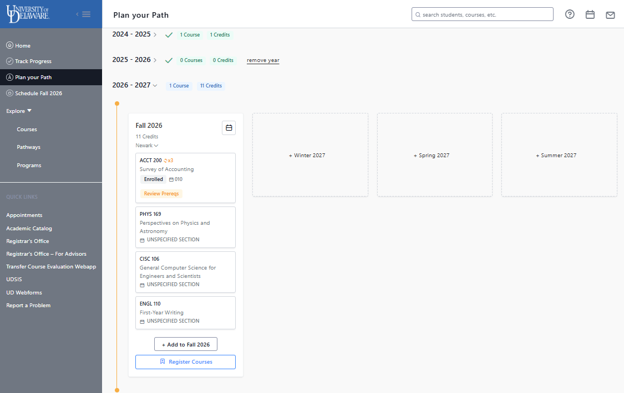
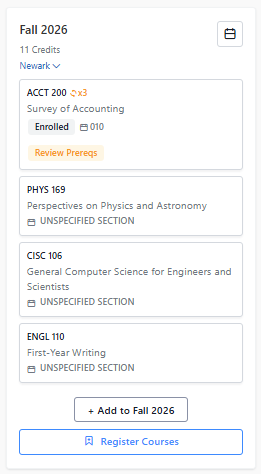
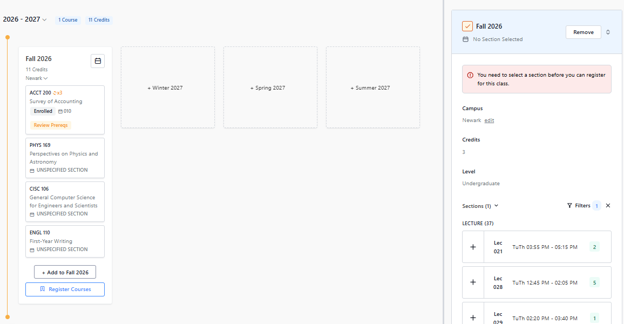
A pop up will appear on the right with the course information and different section options for you to select.
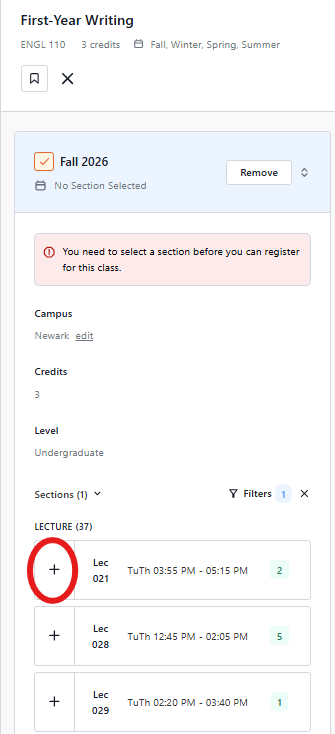
Use the plus sign to select the desired section.
Once the sections have been selected for each course, you can click the Calendar button to schedule.

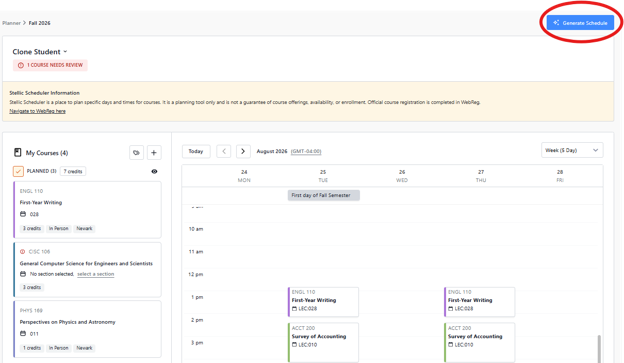
Click the “Generate Schedule” button in the top right corner.
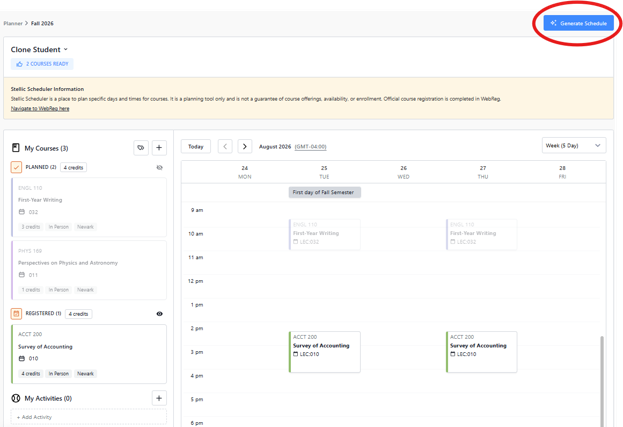
A pop up will appear on the right with options for schedule preferences.
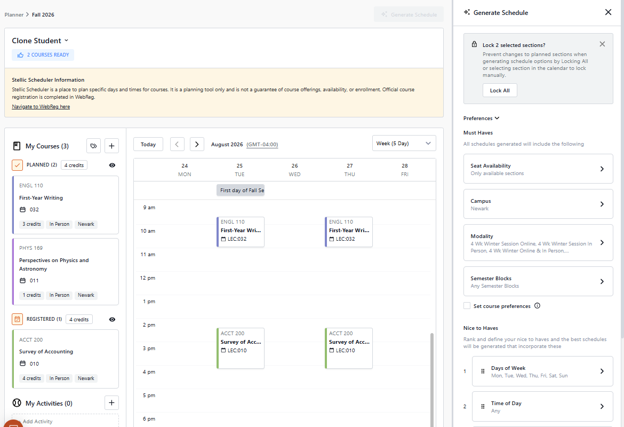
Once your preferences are selected, click “Generate Schedule” at the bottom.
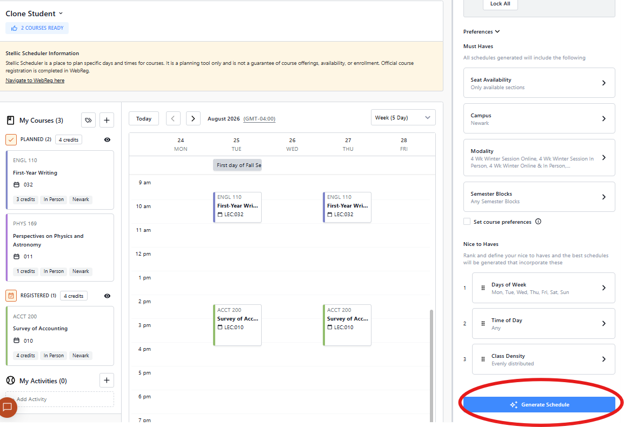
A schedule will be generated.
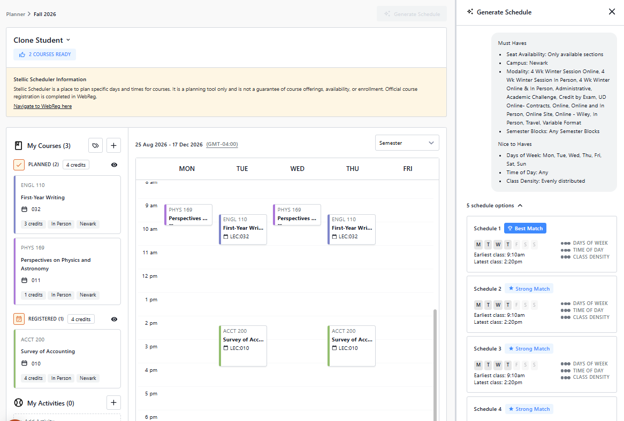
At your registration appointment time, launch WebReg to complete registration.
NOTE: Stellic is separate from WebReg. You will need to look up desired course sections from your saved schedule.
To add courses, click the plus sign +.
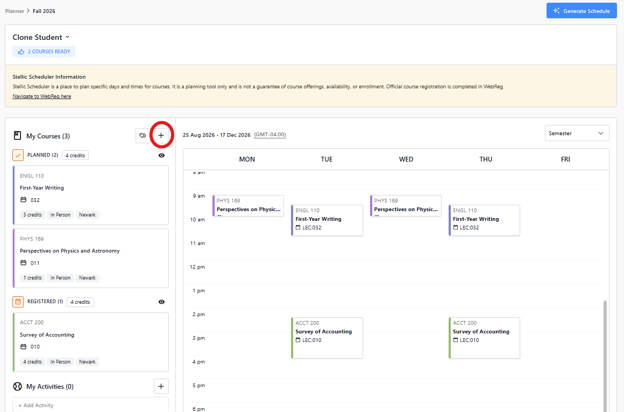
A pop up will appear with options on how to add a course.
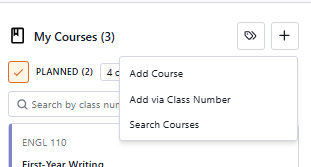
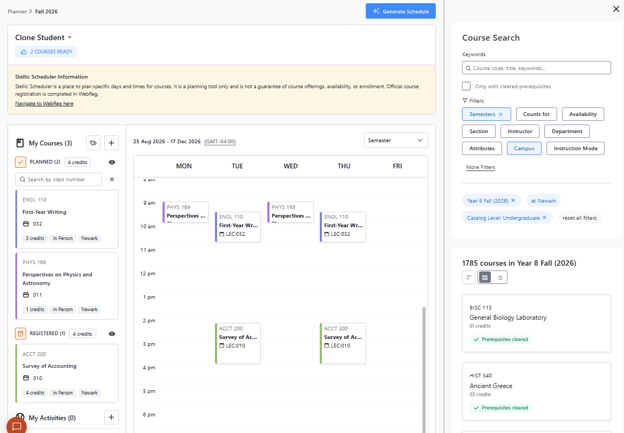
“Search Courses” will provide a pop-up bar on the left to browse for current courses.
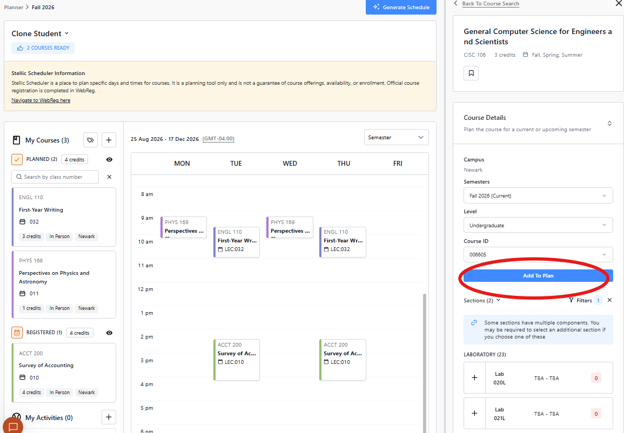
Once you have the desired course, you can click “Add to plan.”
“Add a course” provides a search bar for you to type in the desired course.
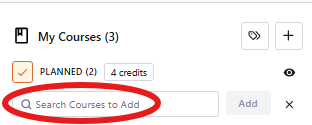
Type in the subject abbreviation and course number.
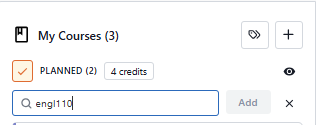
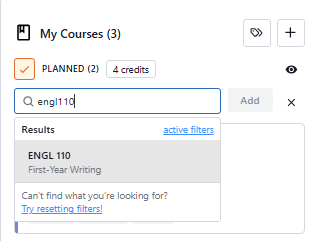
Highlight and select the course.
Click “Add”
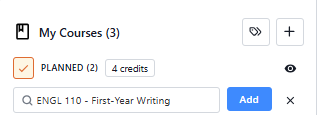
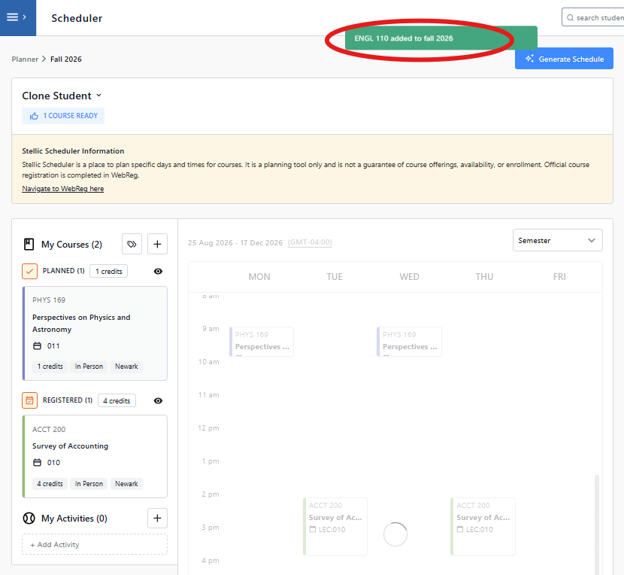
A pop up will appear notifying you that the course has been added to your Schedule.
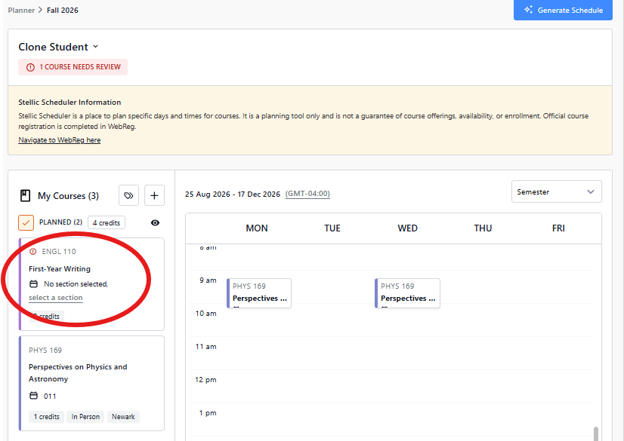
Selecting the course in your “My Courses” list will provide you with choices of different time and day sections.
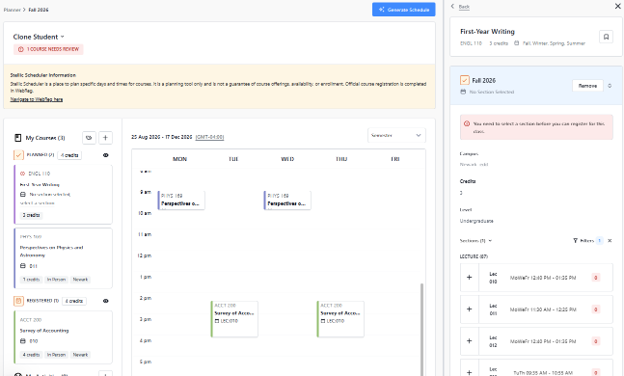
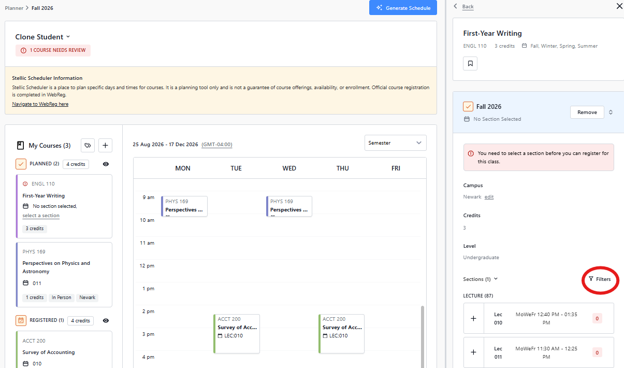
The “Filters” button can be used to narrow down section choices.
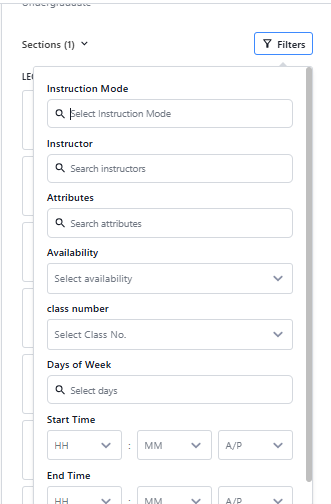
NOTE: Adding a course in Stellic does not register you for the course. Stellic is a planning tool separate from WebReg. Webreg is where you register for courses.
Some majors have multiple course options to satisfy a degree requirement.
You may have added the requirement to your plan to satisfy in a given semester, and now that it is time to plan courses for that semester, you will select the specific course(s) to satisfy the requirement.
This is what it may look like on your Plan:

Once in the term-based planning tool, click on the placeholder:

Click “Search Course”

A right hand menu will pop up, and will see options of courses offered in that term that the requirement:

If you click on one of the courses, you can then either add the course to your plan and use the Generate Schedule process alongside the other courses you have planned for that term

Or you can select a specific section

To remove a course, highlight the course on the left, then click the remove button on the right.

A pop up will appear asking if you are sure you want to remove the course. Click “OK.”
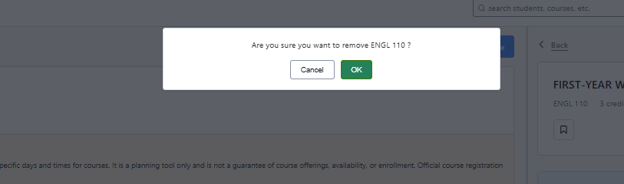
A message will appear that the course has been removed from your Scheduler.

Note: Removing a course from Stellic Scheduler will not remove you from a registered course in WebReg.
Once you have your desired courses, click “Generate Schedule.”
A pop up will appear with choices to filter schedule options by certain metrics. The filter features a “Must have” section which includes filters such as seat availability and campus. The “Nice to have” filter includes preferences on day and time of the week.
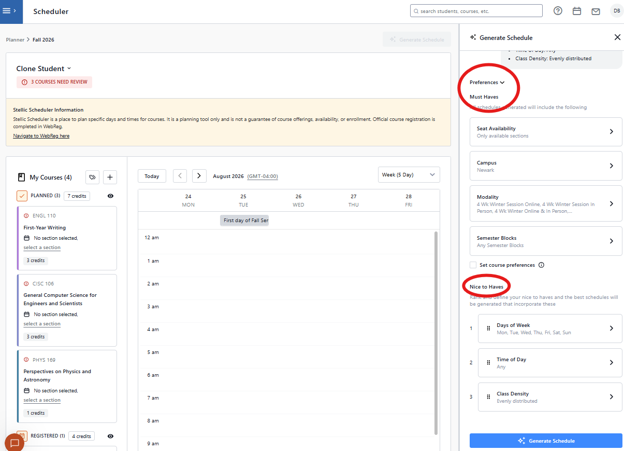
Once you have your preferences set, click “Generate Schedule.”
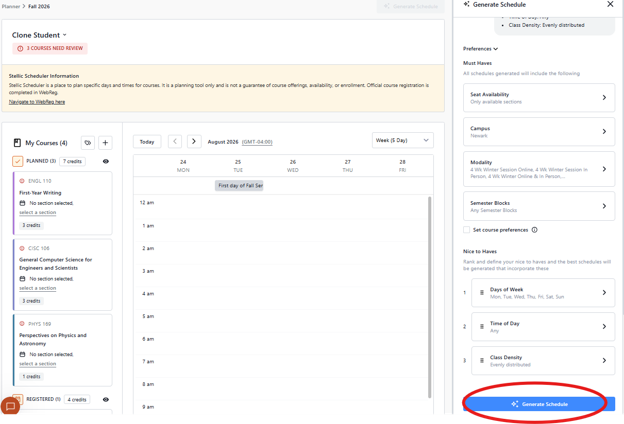
The Scheduler will generate different schedules that best match your preferences.
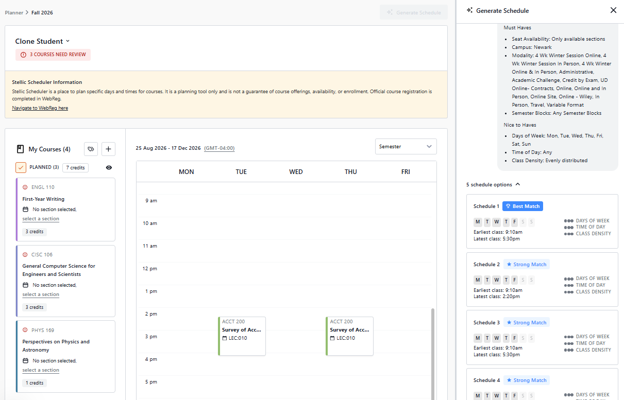
Click through the different schedules to see your preferred choice.
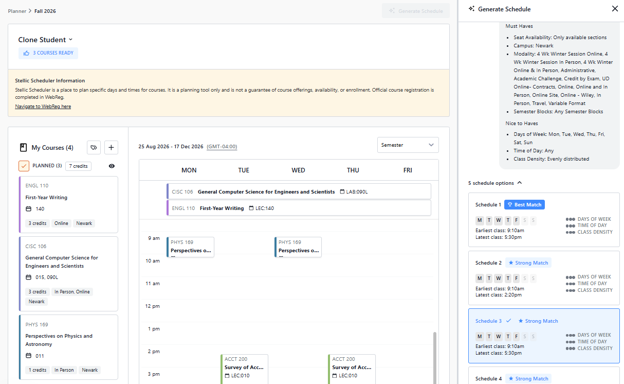
At your registration appointment time, launch WebReg to complete registration.
NOTE: Stellic is separate from WebReg. You will need to look up desired course sections from your saved schedule.
The “My Activities” feature can be used to schedule around time blocks for example sports, clubs, work, etc.

Click “Add Activity" and fill out the fields for the time block you’d like to plan around in your schedule.

Once filled out, you can click “Add Activity” to add to your schedule.

A warning message will appear if you do not meet the pre-requisites or co-requisites of the course.
Solution: Work with your advisor and the offering department to plan next steps for required courses.

Time conflict


A warning message will appear if there is a time conflict with a course.
Solution: Check to see if there are other sections of the course to avoid the time conflict or work with your advisor on alternate course options.