
Validating and Submitting the Schedule

-
Students
- Academic Advisement
- Academic Department Info
- Degrees & Graduation
- Grading & Registration
- Policy Information
- Student Records
- Transcripts
-
Transfer & Test Credit
- How to Transfer Courses to UD
- Transfer Credit Assistant Dean Contacts
- Transfer Credit Contacts by Department
- Test Credit
- Transfer Credit for Military Experience
- Articulation Agreements
- Non-UD Study Abroad Transfer Credit - Recently Reviewed Schools
- Transfer & Test Credit FAQ – Interested & Incoming Students
- Resources
- Forms
- Faculty & Staff
- Advisors
- About Us
- Academic Calendar
Tools & Resources
VALIDATING and submitting the SCHEDULE
1. ‘Validate’ is the equivalent of turning in your schedule.
2. In Design Mode-Plan Phase the scheduling unit is creating the initial schedule and making the most edits. The schedule is held during this time by the scheduling unit in CLSS and edits are not being sent to UDSIS.
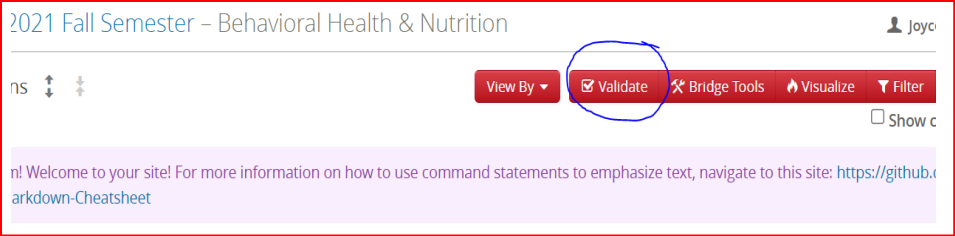
3. When a scheduling unit has completed their initial schedule, to the best of their knowledge, they will click the ‘Validate’ button on their scheduling unit page.
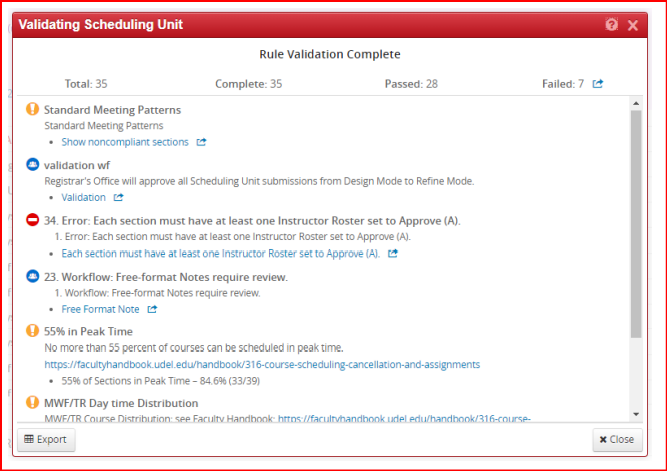
4. The Validation screen will run your entire instance through all Rules, Warnings, and Workflows and provide a summary. If there are any Errors present in the summary, they need to be corrected before you can proceed. Warnings should be looked at carefully, especially if they pertain to Meeting Patterns and day/time distribution.
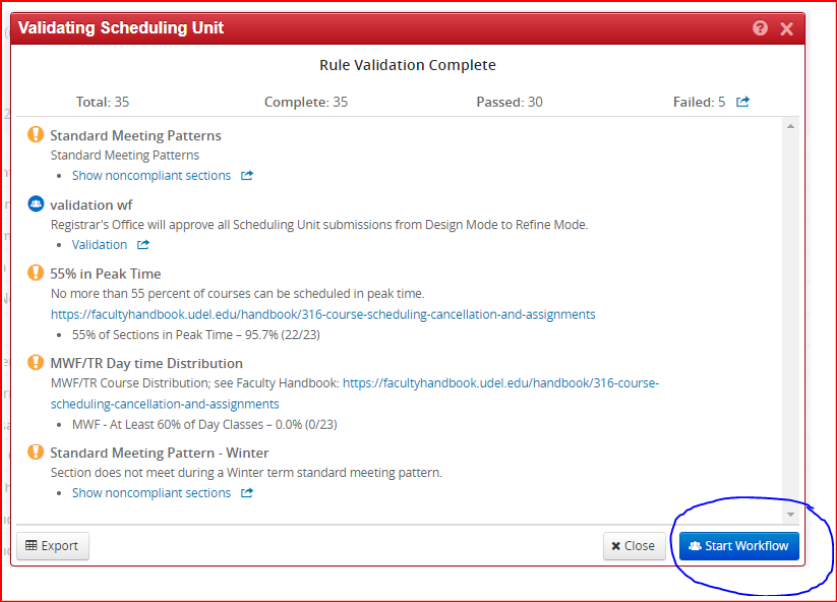
5. Once you have corrected your errors, the next time you Validate you should see a blue Start Workflow button at the bottom right of your validation screen. Clicking that will send your instance through workflow for the Registrar’s Scheduling Office to approve.
6. Once the Scheduling Office has approved your validation workflow, your instance will move into Refine Mode. When your scheduling unit is in Refine Mode, validation is no longer required.
Registrar Link Center
Student Help
University Visitors Center, 210 South College Avenue, Newark, DE 19716 registrar@udel.edu (302) 831-2131 Office Hours: Monday - Friday, 8:30 a.m.- 4:30 p.m.