


Category: Cooperative Extension

Preparations for Fall Turfgrass Establishment
July 09, 2026 Written By: John Emerson, Turfgrass Nutrient Management Agent
The best time to establish cool-season turfgrass is unequivocally late August to mid-September. The weather and soil are still warm enough for the rapid germination of seed and rooting of sod, yet the days are increasingly shorter, nights are becoming cooler, and summer annual weed pressure is dwindling. However, some planning is required to ensure a successful grow-in. Within this article, you will find the step-by-step instructions for before, during, and after planting.
Pre-Planting
Soil Sampling
Sample the soil before any site work takes place to determine fertilizer or lime needs. Allow the lab enough time to test the sample and return the results. One to two weeks is usually sufficient. Follow the lab’s nutrient recommendations for establishment. If you are only overseeding an existing stand and have a valid soil test from the last three years, you can use those recommendations.
Seed/Sod Selection
Selecting the proper cultivar of turfgrass is often overlooked. It could be argued that cultivar selection is the most critical step for the long-term success of a grow-in. There are significant advancements in the genetics of newer cultivars for their desirable traits (color, texture, density, etc.) and their ability to handle both biotic and abiotic stresses. See the UD Extension publication titled, Turfgrass Selections for Delaware, for guidance and the latest list of recommended varieties for all of our common turfgrass species grown in Delaware.
Soil Preparation and Planting
Bare Soil (New)
This scenario is the easiest as the site is free of existing vegetation and commonly requires only corrections in the grade.
Remove any debris from the soil surface (sticks, stones, residual vegetation, building materials, etc.). Any tillage of the soil may bring more debris to the surface and this step may need to be repeated later in the pre-plant process.
Rough grade the soil to ensure water will run off to the appropriate location. Low areas should be raised to avoid pooling, and high spots should be shaved down to match the desired grade.
Install any drainage or irrigation lines.
Backfill irrigation/drain trenches, tamp down and smooth to match the surrounding rough grade.
Spread soil amendments, such as lime or compost*, evenly across the surface.
Till the soil to the appropriate depth to ensure that all amendments are well-incorporated.
Final grade of the soil to ensure surface smoothness - hand tools may be required for “touching up” any small dips, bumps, and imperfections. If possible, use a light-weight roller to smooth and flatten the surface.
Evenly spread any fertilizer that has been recommended by your soil test.
Spread seed evenly in two directions or lay sod.
Staple the ends of sod laid on slopes greater than 10%.
- If laying sod, skip steps 10 and 11.
Lightly drag or roll the soil surface to incorporate the seed and fertilizer.
Cover with a straw or seed blanket.
*Incorporating compost is recommended anywhere soil has been disturbed or soil quality is poor. Compost can be applied at a depth of 0.25 - 1.0 inches for bare soil establishment. A quarter-inch of compost should be tilled to a depth of 4.0 inches, and 1.0 inch of compost to a depth of 6.0+ inches. Depth of tillage should increase as the volume of applied compost increases.
Pre-existing Sites (Total kill + no-till)
This protocol is best for a site that has been contaminated with many non-desirable species or the existing cultivar is no longer performing acceptably. No tillage is required, only slicing or aerifying.
Spray a non-selective herbicide, such as glyphosate. You must allow enough time for multiple applications. You should plan to begin herbicide applications around the end of July if the site is infested with bermudagrass.
2-3 applications at 7-10 days apart at the highest labeled rate will be required. One application is typically not sufficient for acceptable control of bermudagrass.
Ammonium sulfate at 1% v/v concentration should be included in the herbicide spray mixture.
Once total kill has been achieved, mow the existing stand at the lowest setting on your mower without cutting into the soil.
Disperse dense piles of clippings or stockpile for later use.
Clippings can act as a mulch if spread thinly over the surface after seeding
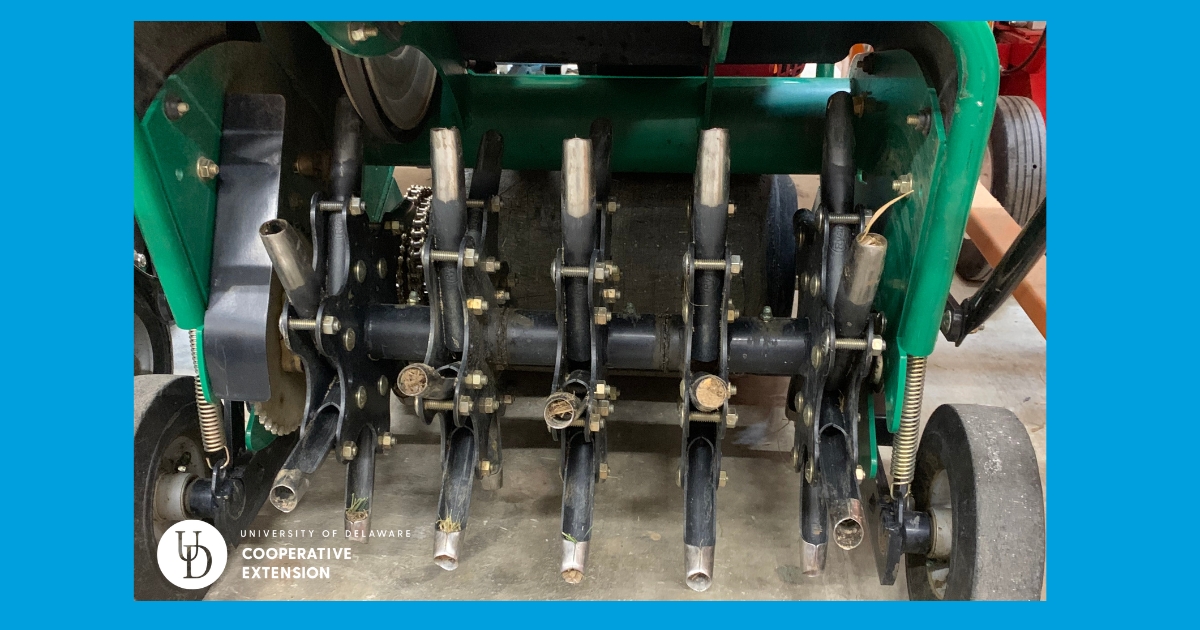
*Aerify the soil with as many holes as possible.
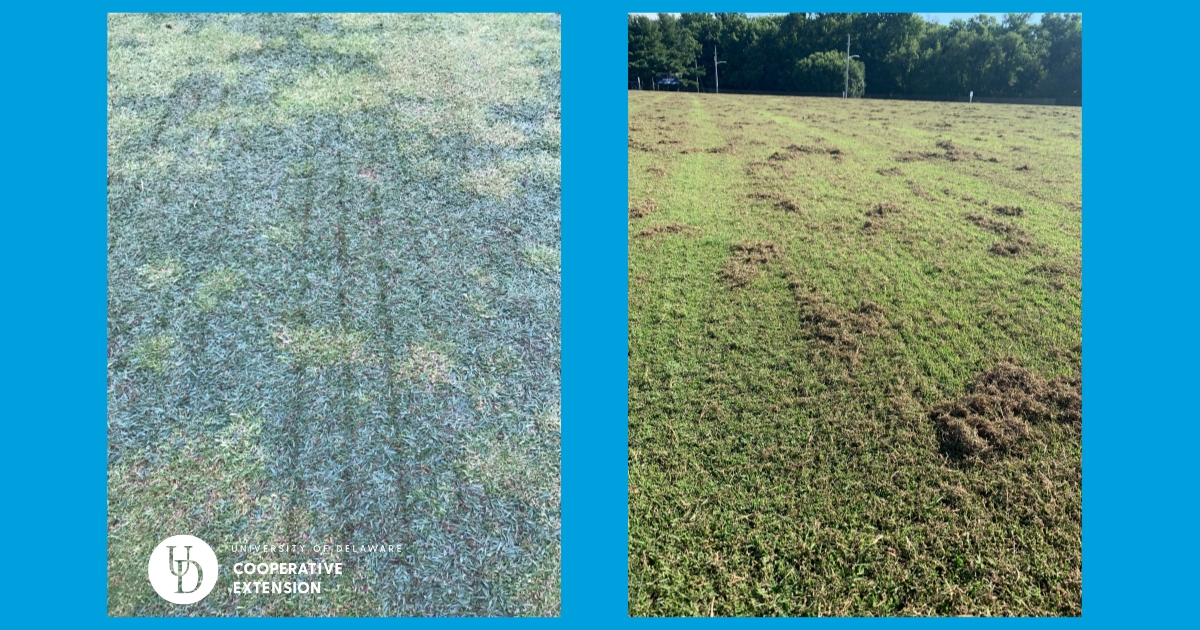
If core aerifying, leave cores lay. They will help improve seed-to-soil contact, and the cores will eventually dissolve back into the soil.
OR
Slice (aka: verti-cut) the soil in multiple directions. Set the slicing unit as deep as possible without the motor bogging down or dying.
Some slicing machines are equipped with a hopper that can be filled with grass seed.
If the slicing machine does not have a seed hopper, or you have aerified the soil, evenly spread seed and fertilizer over the area after cultivation is complete.
**Evenly spread any compost materials over the stand. The depth of compost should be less than 0.25 inches.
Lightly rake or drag the seeded area to help incorporate soil cores, compost, and seed.
Covering the seed with a blanket or straw is recommended on slopes over 10%.
*Depending on the spacing of your aerifier tines, one to three passes in different directions will be required. Rolling walk-behind machines (e.g. Ryan Lawnaire, Billy Goat PlugR, etc.) that have wide tine spacing will require 2-3 passes, whereas a machine, such as the Toro ProCore, may only require one pass due to closer tine spacing. You should aim for as many holes as possible without compromising the stability of the soil surface
**Compost is not required in this step, but it will greatly improve germination uniformity, curb erosion, and is highly recommended.
Pre-existing Sites (Over-seeding without total vegetation kill)
The following steps are designed for scenarios in which you want to introduce improved varieties of turfgrasses into an existing stand or repair areas that have been destroyed by pests, environmental stress, traffic, etc. Total kill of vegetation is not required.
Apply a selective herbicide prior to overseeding if the stand is weedy.
Be sure to check the label for the seeding interval, as many herbicides can retard seed germination. Some herbicides require waiting up to a month before seeding can take place.
Mow the existing stand as low as possible without injuring the turf. A couple of weeks prior to overseeding, incrementally drop the mowing height.
*Aerify the stand in one or two directions. Bare areas or where significant turf loss has occurred can be aerified multiple times or rough raked by hand to open up the soil.
OR
Slice (verti-cut) the stand in one or two directions. The slicing unit should be set just deep enough to create a shallow channel in the soil surface for seed to fall into. If the unit is set too deep, it will pull excessive plant material to the surface and potentially injure the stand.
Some slicing machines are equipped with a hopper that can be filled with grass seed.
If the slicing machine does not have a seed hopper, or you have aerified the soil, evenly apply seed and fertilizer after cultivation is complete.
**Evenly spread any compost materials over the stand. The depth of compost should be less than 0.25 inches.
Lightly rake or drag the seeded area to help incorporate the compost and seed into the holes/channels.
*The idea is to create as many holes as possible for seed to germinate without damaging the integrity or quality of the existing stand.
**Compost is not required in this step, but it will greatly improve germination uniformity, curb erosion, and is highly recommended.
Post-Planting
Water Management
For seeded areas, keep the soil moist, but avoid pooling and runoff. To prevent the seed from washing out while maintaining optimal moisture, apply light and frequent irrigation until germination. Once all of the seed has germinated, irrigation runtimes should increase in duration and decrease in interval. During the germination phase, pay close attention to the weather. If rainwater has sufficiently wetted the soil, refrain from irrigation until the soil begins to dry down. Once the new stand is established and routinely mowed, irrigation practices should be adjusted to a “deep and infrequent” strategy.
For sodded areas, apply enough water so that the underlying soil gets wet. Sod can withstand heavier applications of water to a certain extent, but it should not receive water much beyond runoff. Sod on slopes exceeding 10% are prone to washing out under heavy rain/irrigation conditions and may need to be watered by hand or more frequently.
Mowing
Mowing should begin once the seedlings are well-rooted and actively growing. This could be anywhere from 3 to 6 weeks after germination, depending on the species and growth rate. Once the grass reaches the approximate desired mowing height, mowing can begin. Check that the surface is firm enough for mower or foot traffic and that your blade is sharp.
Mow the sod as soon as it is well-rooted into the soil. Lightly tug on the sod, and if it stays in place, begin mowing. Sod can be quite tall by the time it is well rooted, and you may need to incrementally drop the mowing height.
Fertilization
Apply 0.25 - 0.75 lbs of nitrogen per 1000 sqft 4 to 6 weeks after the first mowing. A slow-release product is ideal so that growth is metered out over several weeks. Switch to a maintenance fertilizer regime after 8-10 weeks.
In closing, achieving a successful grow-in requires careful planning and diligence through every stage of the process. Take the time to sample your soil for accurate nutrient recommendations and select high-quality, improved turfgrass cultivars adapted to Delaware. Carefully follow the appropriate protocol for your specific site conditions, whether you are preparing bare soil, managing a total-kill no-till renovation, or overseeding an existing stand. Protect your investment with precise water management, fertilizer applications, and a well-timed mowing regime.