
Schedule Section Meeting Time

Tools & Resources
Schedule Section Meeting Time
1. Open or add a section
2. Click on the link under Schedule (either Does Not Meet, or a meeting pattern)
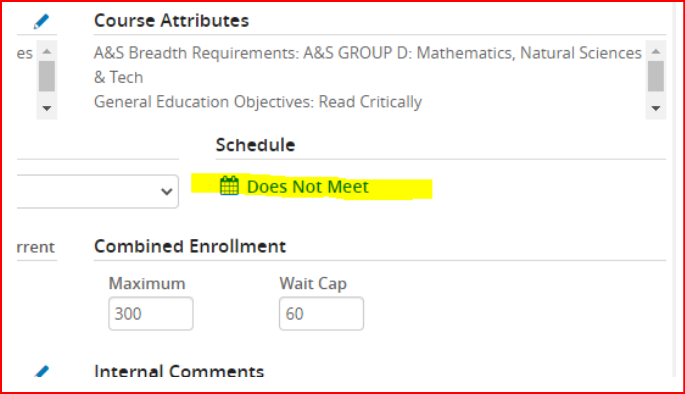
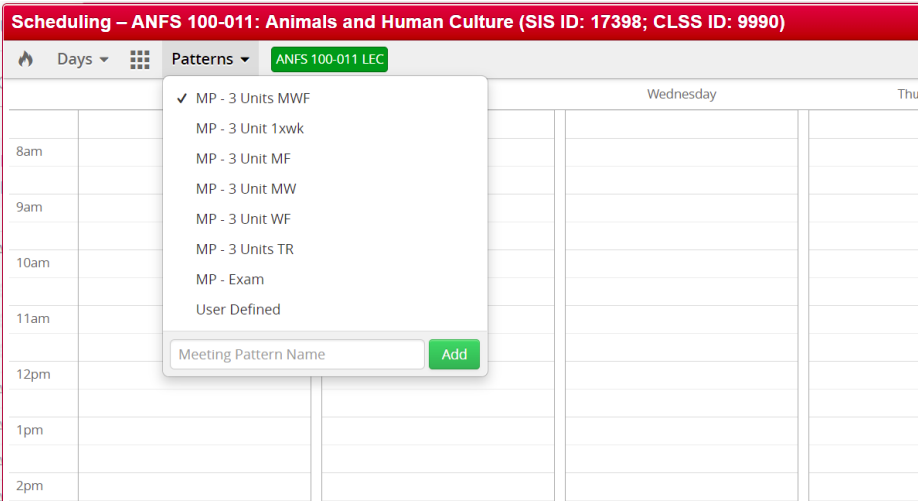
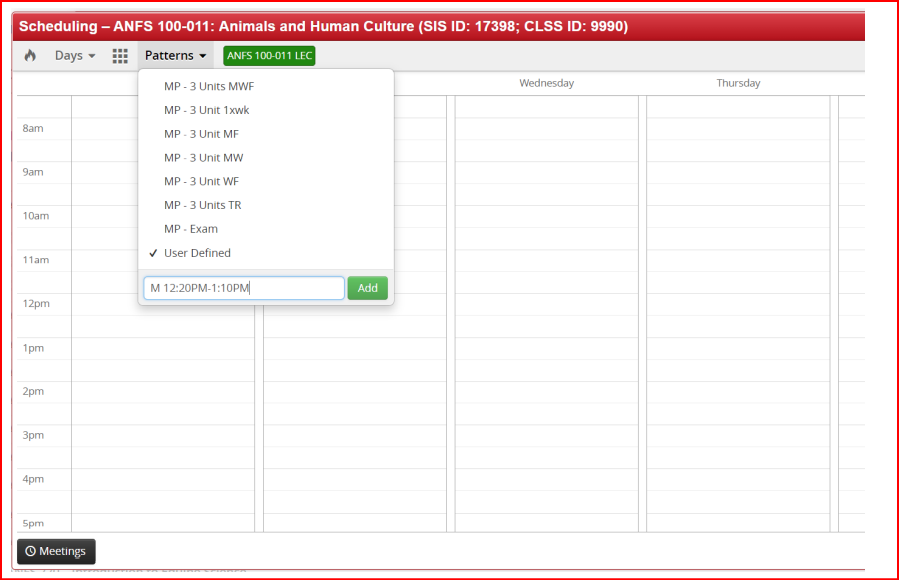
3. From the Patterns drop down, choose a specific meeting pattern type, ex: MP-3 Units MWF.
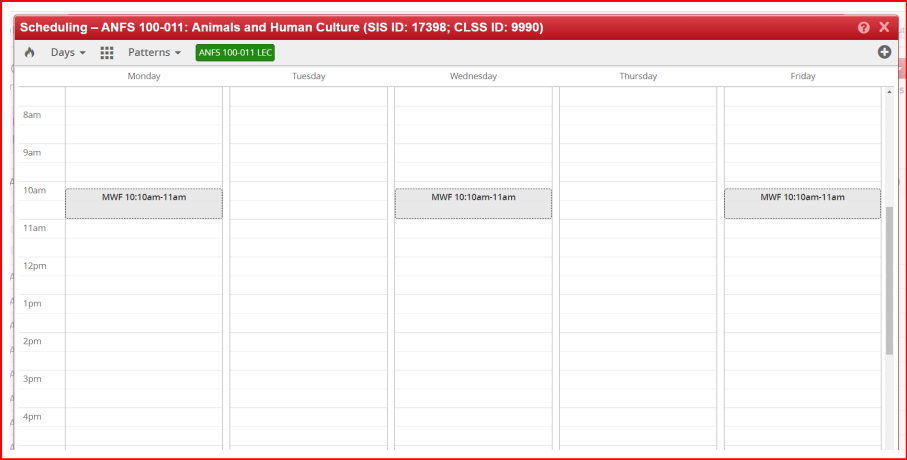
4. When you hover over the calendar, the meeting patterns will appear across the week. When the meeting pattern you would like is highlighted, click inside the calendar.
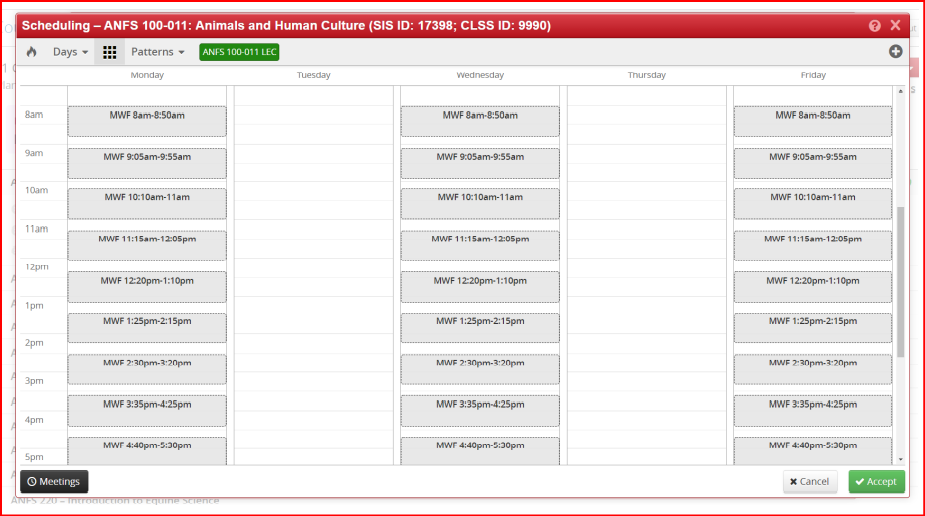
5. To view all times in a meeting pattern, click the grid box to the left of the Patterns drop down.
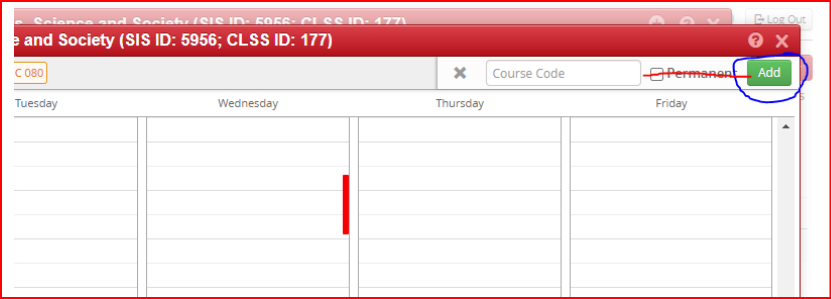
6. Click the (+) in the upper right corner to overlay the schedule of another course(s). DO NOT CHECK PERMANENT--this will create an irreversible pairing of courses in your snapper. Click Add to see an overlay of the meeting times of the other class with the one you are scheduling. This could be helpful in scheduling courses that are corequisites, or that students commonly take together.
7. If you need to enter a meeting time that is not in the Pattern drop down, choose the User Defined option. Click on the Pattern drop down again, and inside the Meeting Pattern Name box, enter the meeting time in the following format: M 12:20PM-1:10PM.
a. User Defined should only be used for courses that are meeting during standard meeting times but not utilizing the entire meeting pattern, such as class recitation meetings, Honors meetings, hybrid courses with different locations, etc. These should begin at the start of a standard meeting time.
8. You can edit or delete meetings by clicking on the black Meetings button, and using the pencil icon on the meeting row to edit, or the trash can to delete.
9. Click Accept to save the meeting and return to the section form.
10. For sections that are Online-Asynchronous, set up the following in the section editor:
a. Campus: Newark (Online)
b. Instruction Mode: Online
c. Meeting Pattern: Does Not Meet
d. Room: Online Course
11. For Sections that are In Person with no meeting pattern (IND, RSC, PRC, etc.), set up the following in the section editor:
a. Campus: Newark (Main Campus)
b. Instruction Mode: In Person
c. Meeting Pattern: Does Not Meet
d. Room: No Room Needed
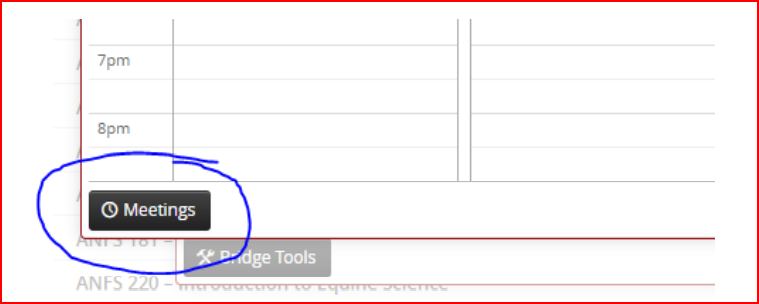
1. To add another meeting, while in the Snapper tool (see steps 1 and 2 in the section above), click the black Meetings button on bottom left of the calendar screen to view the Multiple Meeting box.
2. Click the green (+) on top right to add another meeting row.

3. Fill in Meeting Details box. The Pattern field will be grayed out, you will define the times in the snapper. If the meeting requires custom dates, choose Custom from the Dates drop down menu.

4. Click Accept
5. Click the new meeting pattern row you added to highlight it in green. This will bring you back to the snapper calendar, where you can add your meeting times. Follow Steps 3-5.

6. You can edit or delete meetings by clicking on the black Meetings button and using the pencil icon on the meeting row to edit, or the trash can to delete.
7. Click Accept to save the meeting and return to the section editor.
