
Faculty Center

Tools & Resources
UDSIS Faculty Center
Use these pages to view, download or print class rosters, see your teaching schedule, communicate with students by e-mail and enter or approve grades. (The green numbered boxes on the diagrams correspond with explanatory text below.)
Log in / Log out
- From the UD Home page under Quick Links in the top right, click MyUD and then the UDSIS for Staff tile to access UDSIS (or click direct link here).
- At the UD Central Authentication Service window, enter your UDelNet ID and password. (Your UDelNet ID is your email name that goes with @udel.edu) and click the Log in button.
- When UDSIS loads, be sure you are on the “Faculty and Advsiors Homepage.”
- If the page does not default to the “Faculty and Advsiors Homepage” you can use the drop down to find the correct homepage.

- To logout click the Action List- 3 dots- in the top right corner, and then Sign out.

Menu Navigation
- From your Homepage, you can use the Faculty Center, UD Tools, and Forms tiles to navigate.
- For more help with navigation, see UDSIS 9.2 Navigation Help for Faculty / Staff.

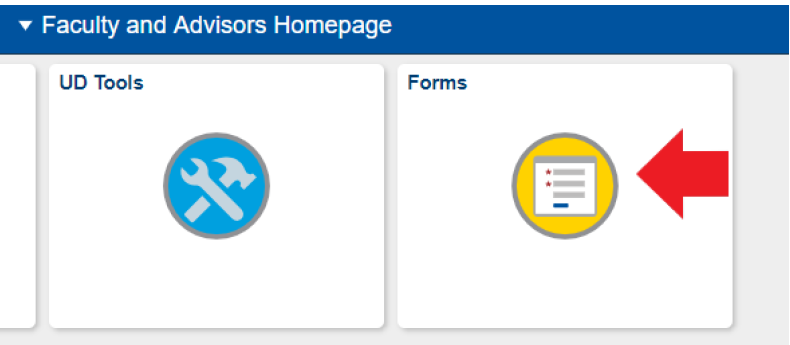
Forms
From the Faculty and Advisors Homepage, select the Forms tile to access webforms related to grading and textbooks.
- Clicking forms on the menu will log you in to webforms in another browser window on top of your UDSIS window.
- The Other forms option takes you to your webforms InBasket, where all available forms can be found under BLANKS.
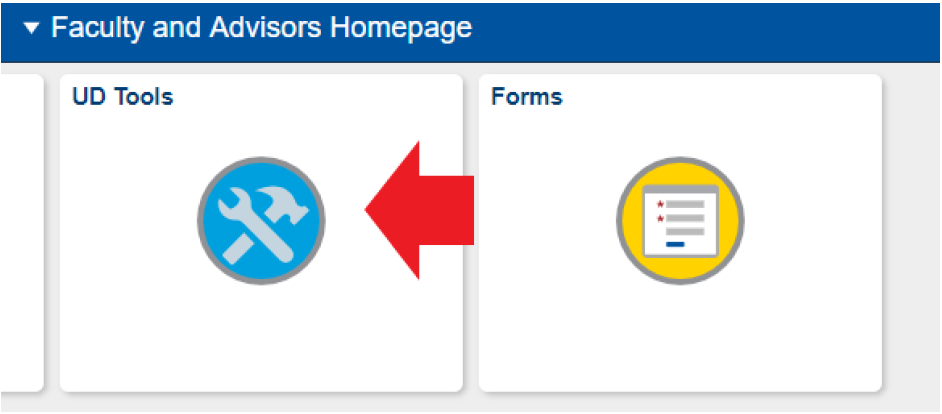
UD Tools
Select the UD Tools tile to access additional resources. When you select an option from the menu, another browser window will open up on top of your UDSIS window and log you in, if required. Here you find links to related UDSIS applications or webpages:
- UD Undergraduate & Graduate Academic Catalog
- Catalogs
- Courses Search
- Supplemental Courses
- Final Exams
- UDSIS Faculty Help – Click here for help using UDSIS or related applications
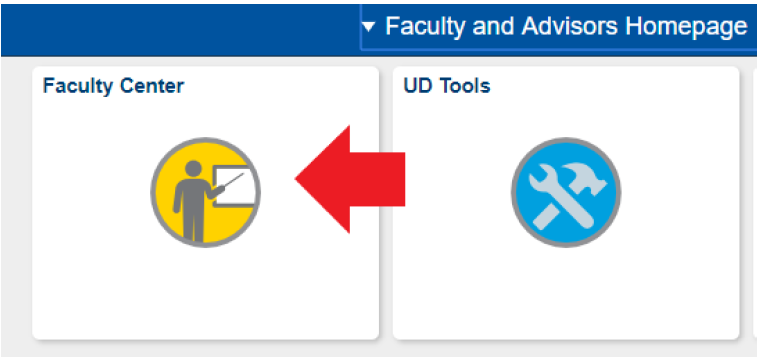
Faculty Center
The Faculty Center tile will take you to your:
- Schedule & Rosters - Click this to view your class and exam schedules in UDSIS.
- Photo Rosters - a picture collage of students in your class or a student you have taught.
- Key Links - List of resources for faculty
- Class Mailing Lists - to send an email to class or majors/minors lists
- Course Evaluations
- Curriculog-Curriculum Mgmt - Click here for information about Curriculog-Curriculum Management, and related forms
- UDSIS Help for Faculty & Staff - Click here for help using UDSIS or related applications
Schedules & Rosters
Click this to view your class and exam schedules in UDSIS.
- If your class is not listed here, check with your UDSIS SOC department contact. This person sets up your department’s classes in UDSIS.
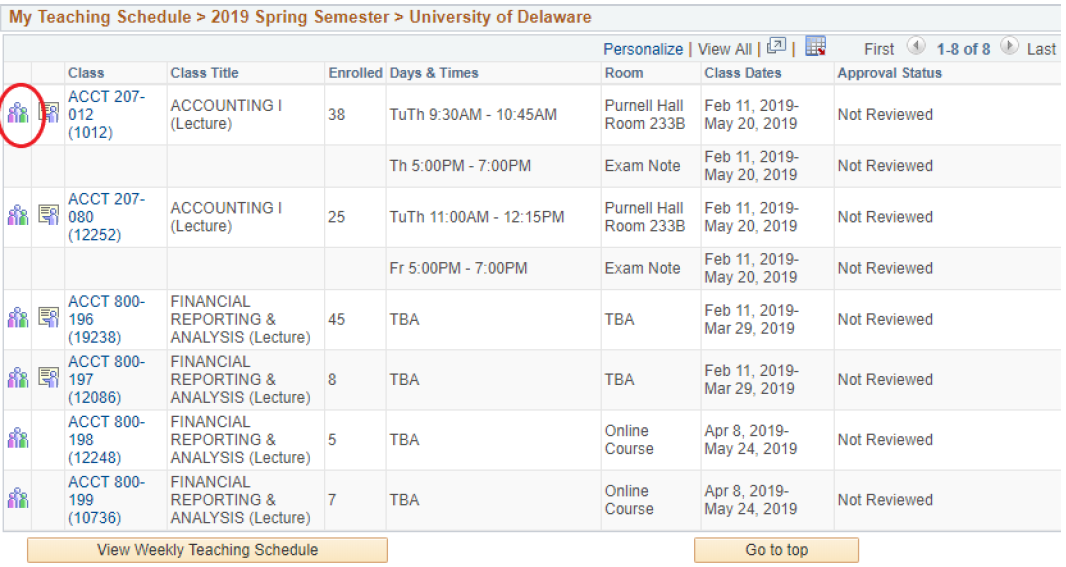
- See picture and the following explanations for information about what is displayed on My Teaching Schedule.
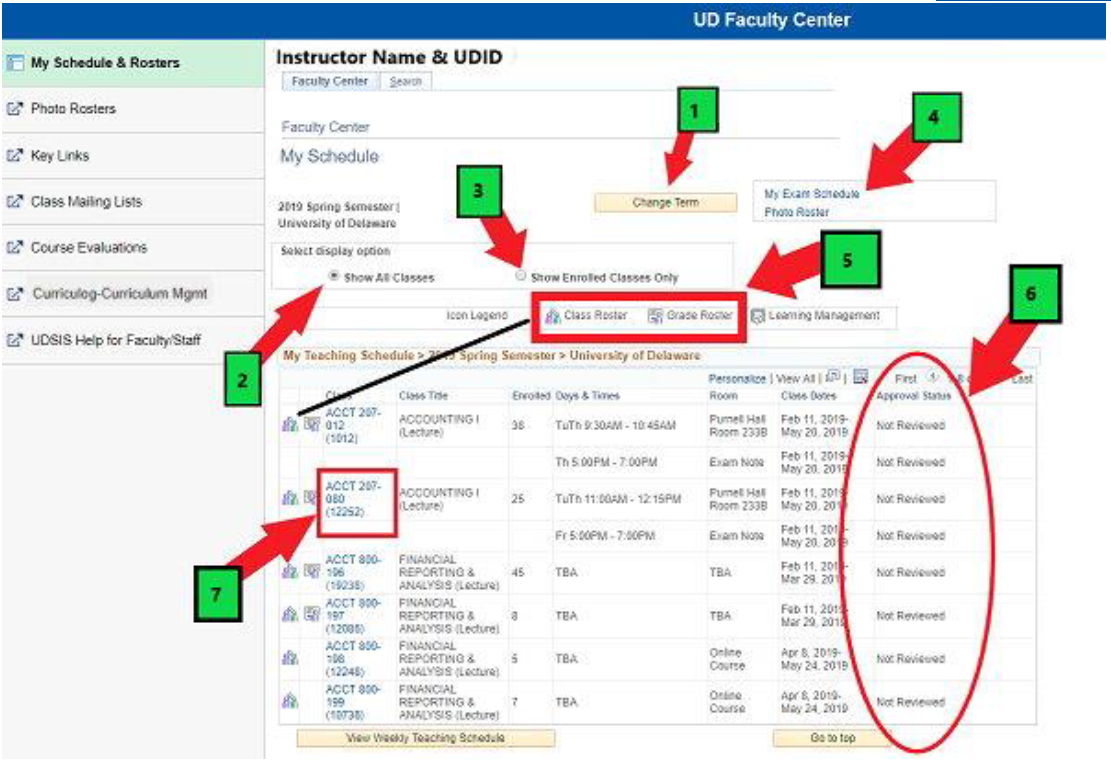
My Teaching Schedule Explanations
- Change Term – The schedule displayed defaults to the current term, but can be changed to another term using the green change term button.
- Show All Classes – This is the default setting and displays all classes available for enrollment that you are teaching for this term.
- Show Enrolled Classes Only – Click to filter out the classes with no enrollment.
- My Exam Schedule – When this information is made available (usually mid-October for Fall semester and mid-March for Spring semester), click to view your exam schedule, which appears below your class list.
- Legend for Class Roster and Grade Roster. These icons will appear in the left column of the teaching schedule when they are available.
- The Approval Status of Grade Rosters appear, so instructors can quickly review grading status for their classes
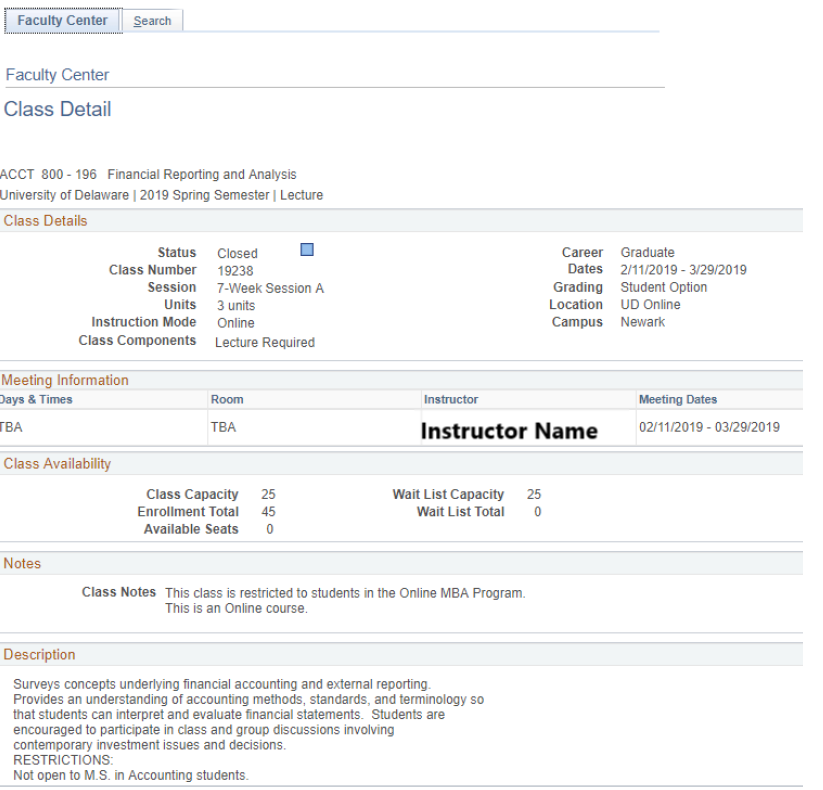
- Click the link in the Class column to see the Class Detail. Then click the Return to Faculty Center link to return to My Schedule.
Class Roster
Click on the Class Roster icon to view or print a class list.
Your class roster appears, with the default view of enrolled students, listed alphabetically by primary name, with the student’s preferred first name in parenthesis. The order of the students in the roster can be changed by clicking ANY of the column headings.
- View FERPA Statement – this “window shade” icon and link are a reminder for how to handle confidential information on a student’s record.
- Download to Excel: This icon allows you to download a Class Roster to MS Excel. It may take a few moments for the download process to happen
- Audit Indicator: If the student is auditing the course, you will see AUD in this column.
- Print a Class Roster: Click on the Printer Friendly Version button at the bottom, and then print the page from your browser.
Additional information about Class Rosters is available here.
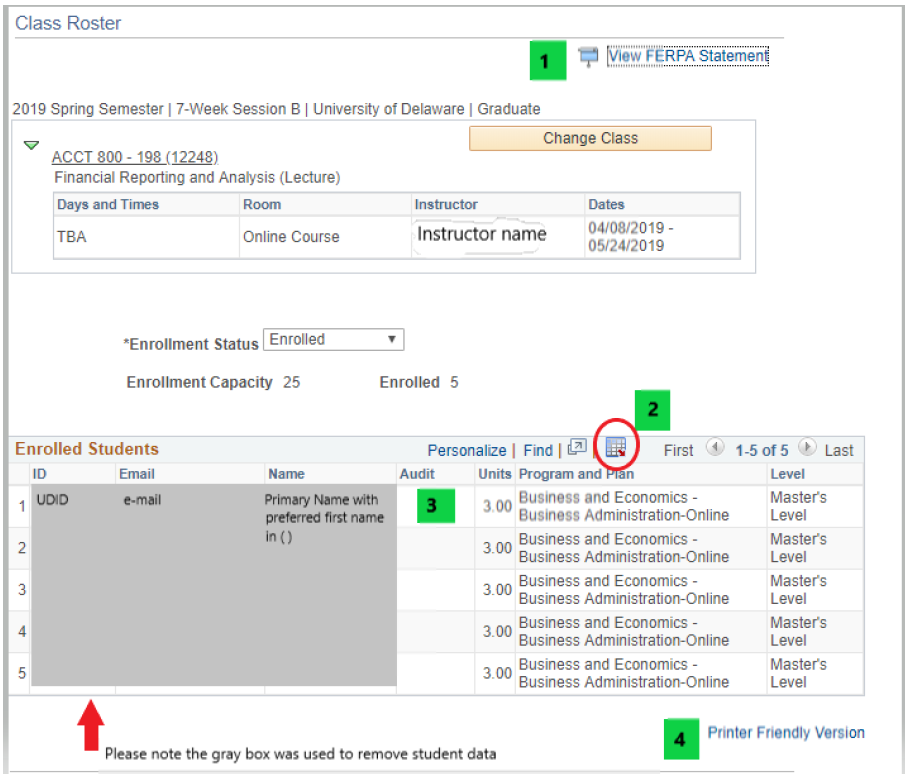
Photo Roster
- Under Faculty Center OR at Faculty Center > My Schedule & Rosters” in the box on the right, opposite the term, click the Photo Roster link.
- Choose a term and a course to see a full class list of photos. NOTE: this may take a while if it is a large lecture class. The photos are to be treated as PNPI.

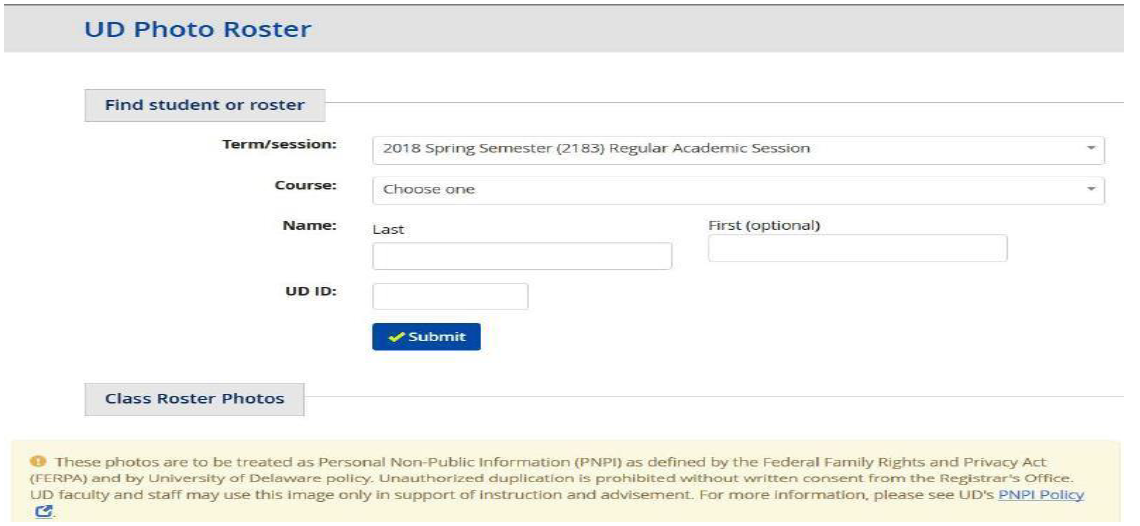
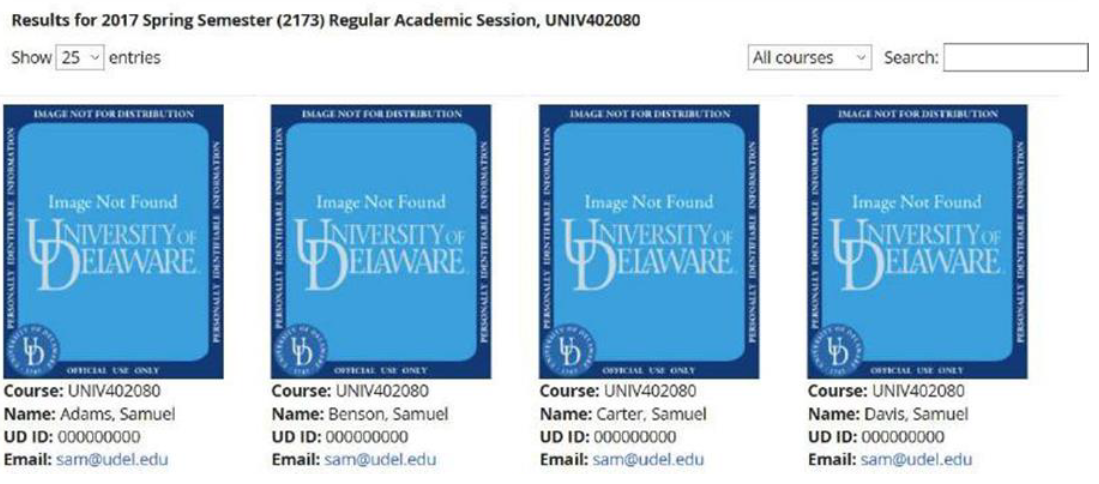
The pictures are listed alphabetically by primary name, with the student’s preferred first name in parenthesis.
To view a particular student, enter the name or UDID. This will search any course the instructor has ever taught for that student. A student will not show in the results if the instructor has never taught that student.
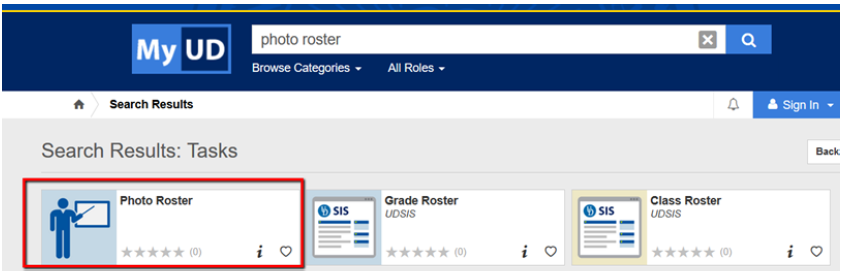
Instructors can also access their class photo rosters outside of UDSIS:
- Directly at http://www.udel.edu/photoroster
- Through My UD (www.udel.edu/myud) and search for "roster". It will be one of the tiles returned in the search.
Grade Roster
Click on the grade roster icon to view/edit the grade roster
- Only instructor(s) and TA(s) listed on the course in UDSIS can enter or approve grades.
- Grade Rosters are available in Faculty Center at mid-term, for students who were admitted as freshman to UD and are in their first or second UD semester, and at the end of each semester/session for final grading.
- Additional information on Grading, Grade Rosters and Deadlines is available here.
- Classes that have multiple components (e.g. lecture, lab, discussion) have only one component as “grade-able”.
Grading for a course where a graduate teaching assistant enters the grades and the faculty member approves them:
NOTE: The Graduate TA must have Grade access on the course. Then he/she follows these steps:
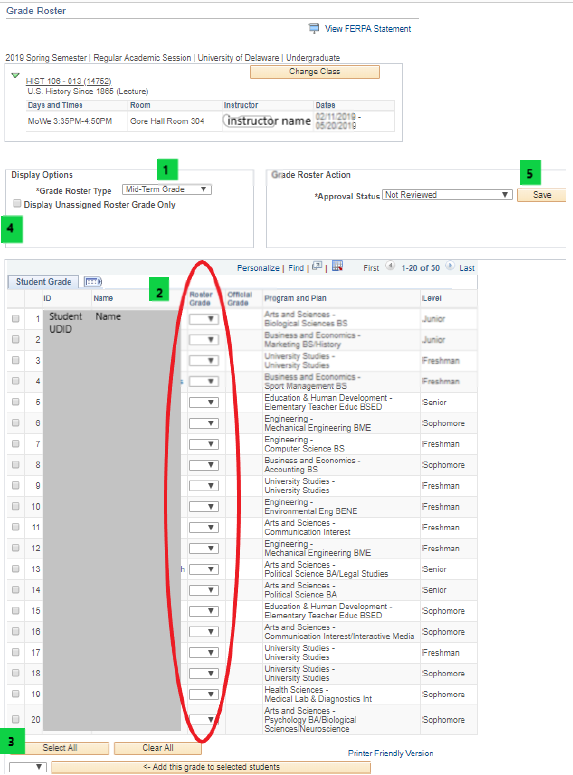
1. Grade Roster Type – Select Final Grade or Mid-Term Grade (freshmen only).
2. In the Roster Grade column, enter a grade for each student using the dropdown.
Hit the SAVE button at the bottom of the list periodically as you enter grades. The system will respond with a SAVED message in the top right corner of the screen.
You will receive a warning noting that you have unsaved information on the page. Continue adding grades and click the SAVE button at the bottom of the screen OR next to Approval Status.
Faculty Senate approved change-October 2018: Instructors are now required, for all grades of F or Z, to enter a “Level of Participation” value. If the student’s participation level was “Partial”, a “Last Date of Participation” must be provided listing the last date of class attendance or the date of the last graded assignment. For more information, see details/definitions.
3. For the option: add this grade to selected students. Click the checkbox in the first column next to the student to add, or select all. Then enter the grade and click the button.
4. Display Unassigned Roster Grade Only – (optional) click this box to find any blank grades. Note that it re-numbers the students.
5. When complete, go to the Approval Status dropdown and change it to Ready for Review. The faculty instructor will review and finalize the roster.
Click the SAVE button next to Approval Status and note the SAVED message briefly appears in the top right corner of the screen.
Faculty approval of the Grade Roster:
NOTE: Faculty must have Approve access on the course in UDSIS. Then follow these steps:
- Go to My Schedule and click the Grade Roster icon next to the desired course.
- Review grades and make any changes if needed.
- If grades were entered by a Grad TA, verify all grades were entered and are correct (change grades if necessary) OR enter the grades yourself using the dropdown.
- When complete, go to the Approval Status dropdown and change the status to Approved and hit the SAVE button.
- This change in status should now appear on the course row when you return to My Schedule.
If you receive the error “All students must be graded” when trying to set the Approval status to Approved, this could be for one of two reasons:
- Some grades were left blank. (Try clicking View All, or click Next to view more students on the roster).
- Grade Roster Approval Status for course sections with multiple grading instructors (such as Dissertations or Independent Studies) cannot be set to Approved by faculty. Faculty having to grade students in these sections need only to enter a grade, and hit Save (leaving the roster status as Not Reviewed). Registrar staff review and post these grades throughout grading periods. To verify if the grade was saved, exit and return to the roster, if the save was successful, the grade will still be present.
If you need to change grades after you have “approved” them, but before they have been posted:
- Change the Approval Status to Ready for Review,
- The dropdown grades become available again; change the grade(s) as needed, and
- Change the Approval Status back to Approved.
The Roster Grades will become the Official Grades after the grades are posted by a nightly process run by the Registrar’s Office during grading periods.
Students will be able to see the grade posted the following day in their UDSIS Student Center.