
Final Grading Instructions

-
Students
- Academic Advisement
- Academic Department Info
- Degrees & Graduation
- Grading & Registration
- Policy Information
- Student Records
- Transcripts
-
Transfer & Test Credit
- How to Transfer Courses to UD
- Transfer Credit Assistant Dean Contacts
- Transfer Credit Contacts by Department
- Test Credit
- Transfer Credit for Military Experience
- Articulation Agreements
- Non-UD Study Abroad Transfer Credit - Recently Reviewed Schools
- Transfer & Test Credit FAQ – Interested & Incoming Students
- Resources
- Forms
- Faculty & Staff
- Advisors
- About Us
- Academic Calendar
Tools & Resources
Grading Instruction for Final Grades
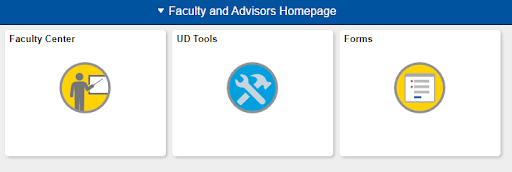
1. Login to UDSIS, go to your Faculty Self-Service Center, and click on My Schedule & Rosters.
2. From there you should see your Teaching Schedule, which will show the courses on which you are listed as the instructor for this term. If you would like to look at a different term, click Change Term and select the appropriate term.
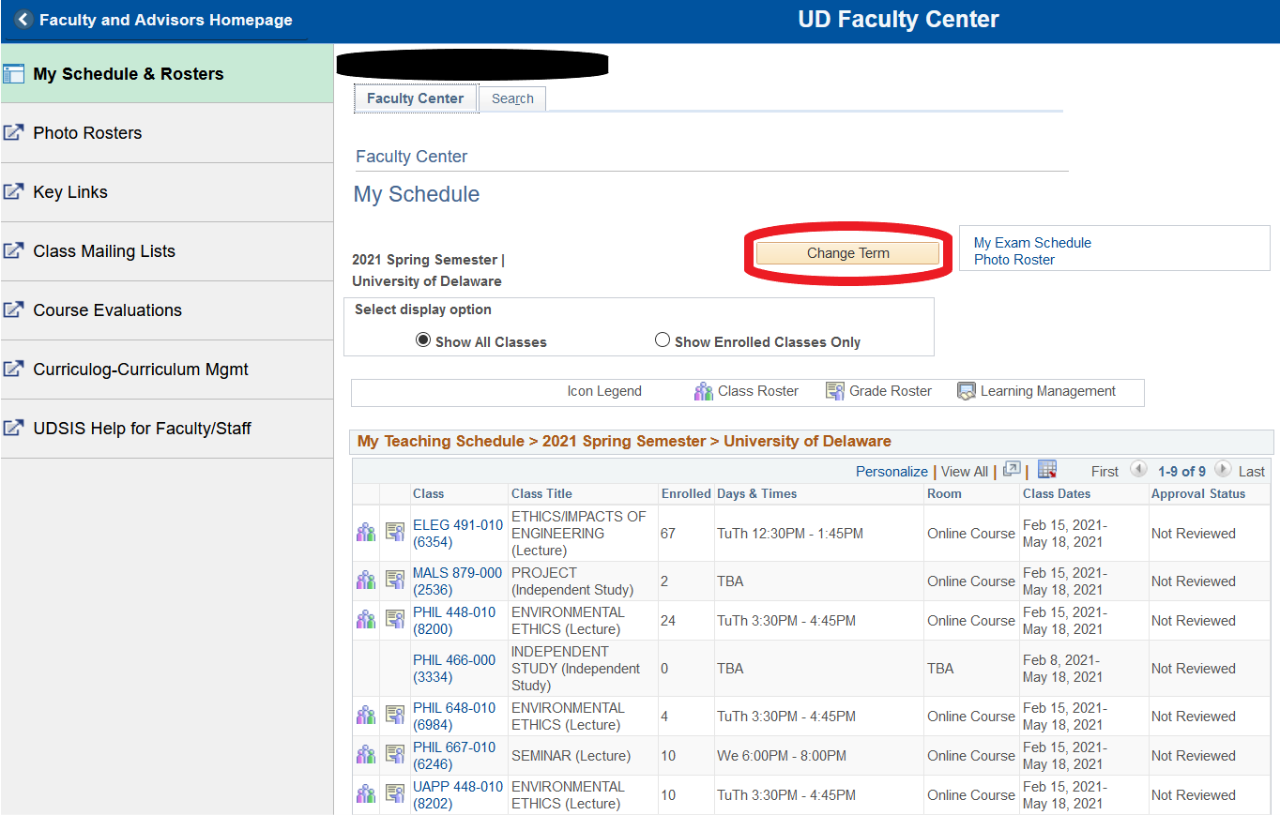
3. From your Teaching Schedule, click on the grade roster icon for the appropriate course.
4. If your course had a mid-term grade roster, it may default to the mid-term roster instead of the final grade roster. Make sure to select the “Final Grade” Roster Type to view the appropriate roster.

5. In the grade roster, input Roster Grades by selecting a grade from the drop down next to each student and then clicking the appropriate grade.
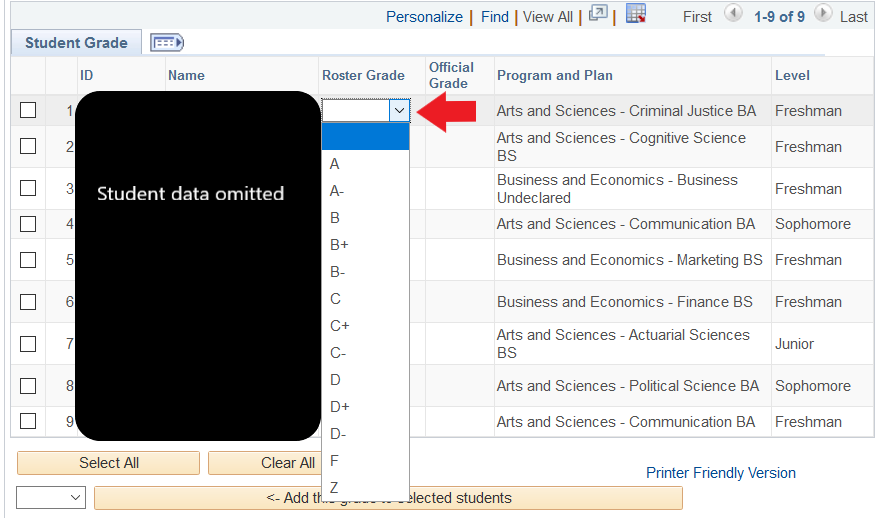
6. For any F or Z grades, you will need to note the student’s level of participation, using the drop down.

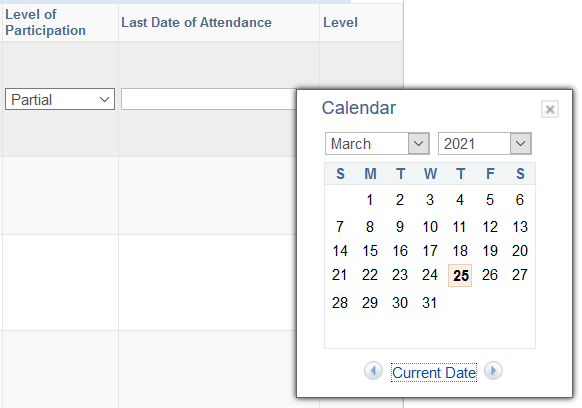
6a. If the level of participation was “Partial” you will also be prompted to provide the last date of participation. Enter the date or click the calendar icon and use the calendar to select the appropriate date.
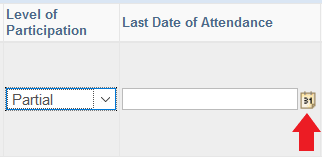
6b. If you use the calendar icon, you can use the Month drop down or use the arrows next to “current date” to navigate to the correct month. Once you select the day it will bring you back to the roster.
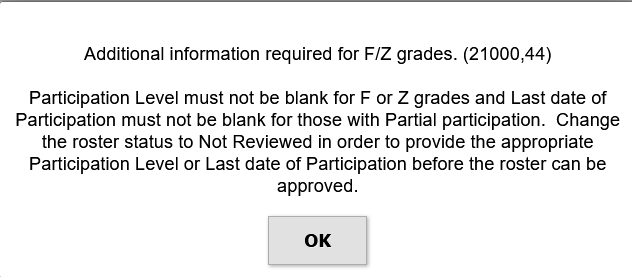
6c. If you attempt to proceed without the level of participation or last date of attendance (for partial participation), you will receive the an error message.
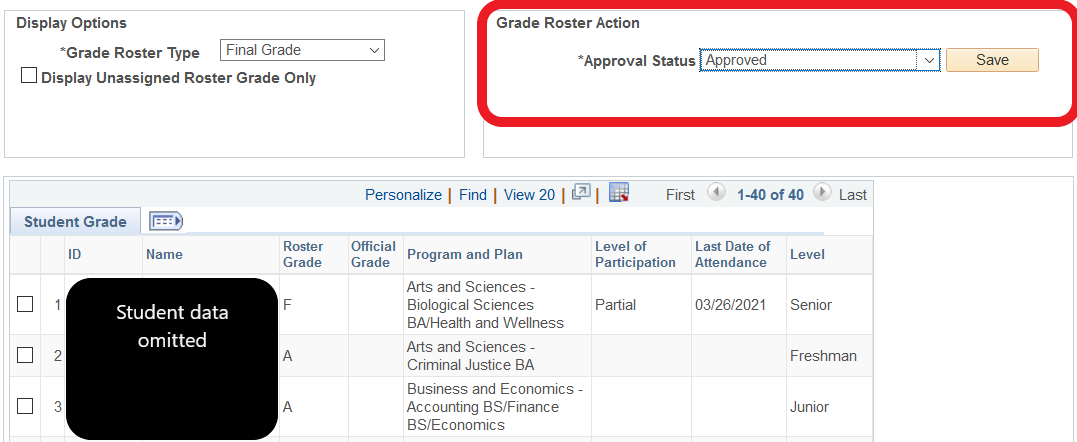
7. When all grades and additional info (if applicable) are entered change the Approval Status from "Not Reviewed" to "Approved" and click save.
7a. If this error message appears, check to ensure you have entered grades for all of your students.

7b. You may have additional students that you didn’t initially see, click “view all” or use the arrow to navigate to the second page (if applicable).

7c. If all students on your roster are graded and you still receive the message, your course is a multi-instructor course. Change the Approval Status back to "Not Reviewed" and click "Save." Registrar staff track these courses and will post grades once saved.

Grade Posting
- The approval status must be set to “Approved” in order for grades to post.
- Once the Approval Status of the grade roster is set to “Approved,” the grades will be posted in the next nightly grade posting job (scheduled by the Registrar’s Office).
- The Registrar’s Office monitors multi-instructor sections to partially post grades so graded students may receive their grades.
Additional Resources
- Grading, Grade Rosters & Deadlines page on the Registrar’s Website
- 3.1.9 Grades in the UD Faculty handbook
Questions
- Contact grading-registration@udel.edu if you have any grading questions.
Registrar Link Center
Student Help
University Visitors Center, 210 South College Avenue, Newark, DE 19716 registrar@udel.edu (302) 831-2131 Office Hours: Monday - Friday, 8:30 a.m.- 4:30 p.m.
