
Adding Images to Content
To add an image to the body of a page, story, or other content type, follow these steps:
- Click the Insert/Edit Image button in your editor. (If you use an editor other than the one used here, this button will probably look different.)

- The Image Properties dialog box will open, which should look similar to the following:
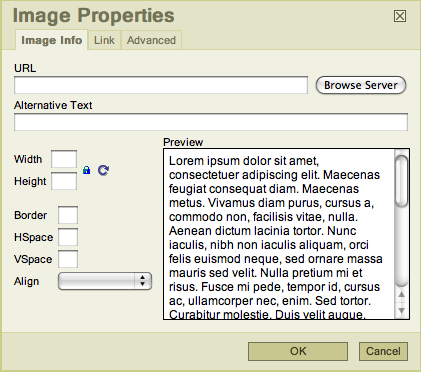
- Select an image to insert into your page. In general, you can link to an image in the following two ways:
- To use an image already posted on another Web site, type its address in the URL box.
- To use an image already on your UDrupal Web site, click Browse Server (Uploading Files via IMCE instructions).
- Configure how the image looks within the body of your content. The selections that you make will appear in the Preview window using the following options:
- In the Alternative Text box, type a description of the image.
- In the Width and Height boxes, type values to change the dimensions of the image.
- In the Border box, type a value to add a black border around the image.
- In the HSpace box, type a value to add a horizontal white-space buffer around the image.
- In the VSpace box, type a value to add a vertical white-space buffer around the image.
- In the Align drop-down box, click the option to orient how your text and image are positioned (e.g., left-aligned, right-aligned, etc.).
- Click OK when you are finished.
- The File Browser window will appear, which should look similar to the following:
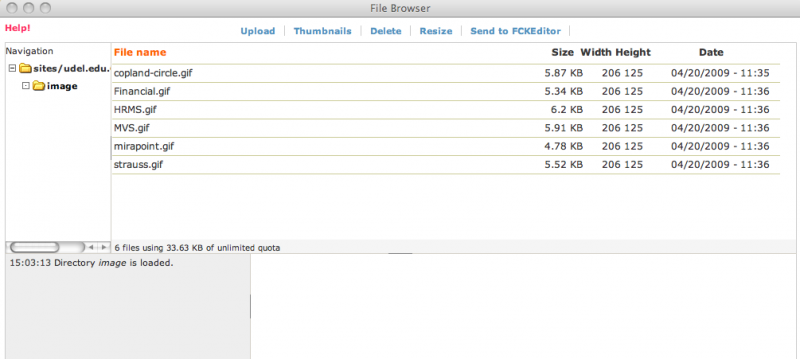
The File Browser widow displays the files available on your site: Available folders are listed in the Navigation column on the left; available files are listed on the right.
- Click the file name of the image you want to use.
- Click Send to FCKEditor (at the top of the window). The Image Properties dialog box will appear again.
- When you finish setting the image properties in the Image Properties dialog box, click OK.
- If you want to change an image's properties after you've inserted one, follow these steps:
- Click on the image.
- Click Insert/Edit Image to make the desired changes.
- Click OK.
