Keeping
Your Outlook Messages on the Mail Server
To keep
your inbox e-mail messages on the mail server, you must set up the
incoming mail server as an IMAP client. By default, the Outlook setup
wizard will configure the incoming mail server as
POP3 rather than IMAP. If Outlook is set up as a POP3 account, the
first time you
open your e-mail, your inbox messages disappear from the mail server
and are put in a folder
on your
local computer. While using the wizard, you must manually configure the
server settings to prevent this from happening.
If your messages have already been moved to a folder on your local computer, to get them back to your UD e-mail, you must
first remove the Outlook POP account and then set up an IMAP account.
To do this:
- Open
the Windows Control Panel.
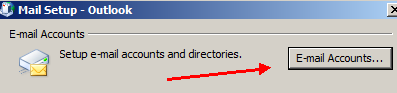
- Double-click
the Mail icon:

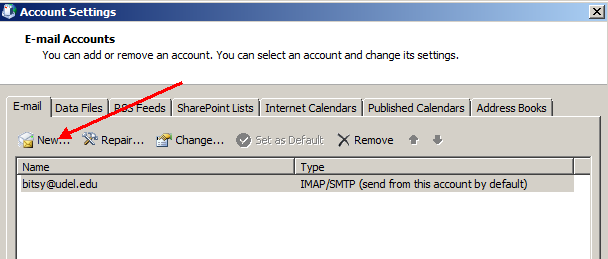
- Click the E-Mail Accounts button.
- Select
the POP account
(it will show "POP/SMTP" as its account type). Click
Remove then
Yes to confirm. (The e-mail messages will remain in the folder on your local computer.)
Next,
you will create a new e-mail account
in Outlook 2007 and set it up as an IMAP client.
Create
an E-mail Account
in
Outlook 2007
- In the Windows Control Panel, double-click the Mail
icon.
- Click
the E-Mail Accounts button.
- Click
New:
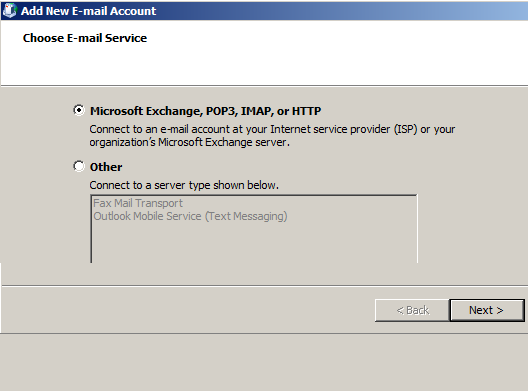
- Accept the default
selection of "Microsoft
Exchange, POP3,
IMAP or HTTP" and click
Next:
- Click the check box next to Manually configure server
settings or additional server types:
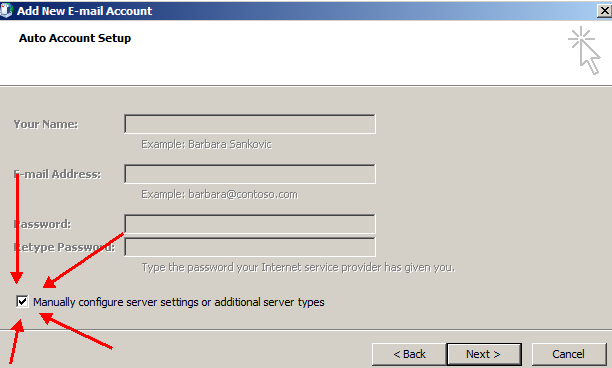
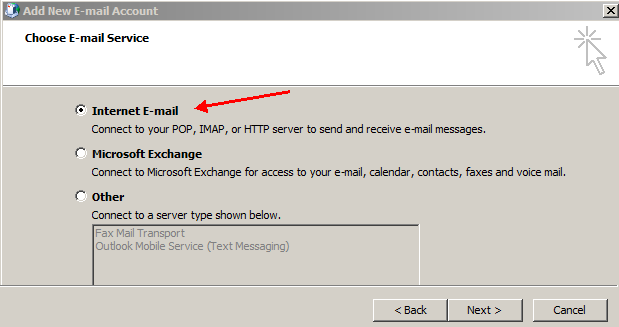
- Make sure the option button next to "Internet
E-mail" is selected then click Next:
- In the
"Add New E-mail Account" window, type Your
Name in the
box labeled "Your Name":
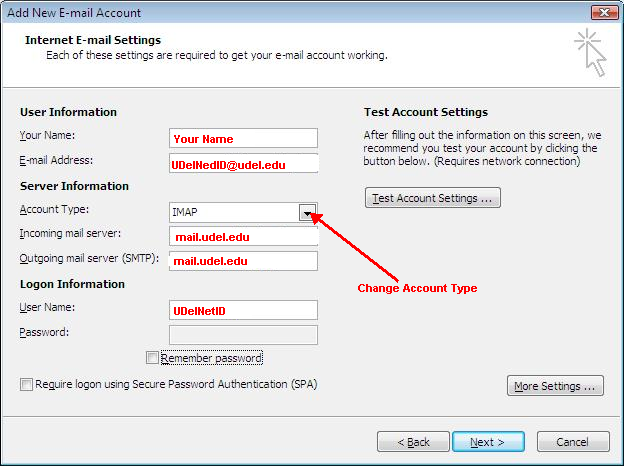
- Type your_udelnetid@udel.edu
in the box labeled "E-mail Address."
- Set
the "Account Type" to IMAP.
- In the box labeled "Incoming mail server (IMAP)," type mail.udel.edu.
- In the box labeled "Outgoing mail server (SMTP)," type
mail.udel.edu.
- Type your_udelnetid
in the box labeled "User
Name."
- Leave
the box labeled "password" blank.
- Clear the check box next to "Remember password."
- Click
Next.
- Click
Finish.
- Click
Close to close the "Account
Settings"
window.
- Click
Close to
close the "Mail Setup-Outlook" window.
- Double-click the Outlook
icon on the desktop or Start menu to open the program.
- Log in
using your UDelNet ID password and
click OK.
Your
account is now set up.
Next, you can return your mail to the UD e-mail server.
Return
your e-mail to your UD e-mail server
inbox
- After
you have added the New Account, open Outlook. The messages that were
downloaded from the POP account should be under "Personal
Folders"
in your local inbox.
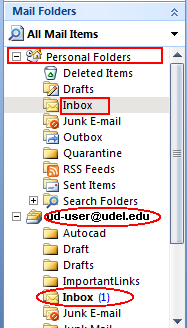
- Select and drag the messages from
the "Personal
Folders" inbox to the inbox under "ud-user@udel.edu."
- Verify
that the messages are now in the remote inbox by logging into Webmail
Direct at
http://mail.udel.edu.
- If the messages are on the remote mail server, you can
either
leave them in the Outlook local inbox or delete them.
- Close Outlook. Leave the
account set up as an IMAP client.

