McAfee VirusScan: Manually Scan Your Computer
(Windows Vista)
By default, the UD version of VirusScan
will automatically scan your computer
every Wednesday at about noon. If your
computer is off at that time, or if you
want to scan your computer more
frequently, follow these instructions.
Any files that can be cleaned will be
retained; any that cannot will be
deleted. If for any reason you are
unable to run a scan or if McAfee is
unable to clean or delete the virus, scan your computer in Safe Mode.
Temporarily Disable System Restore
- Click the Start button.
- Right-click Computer.
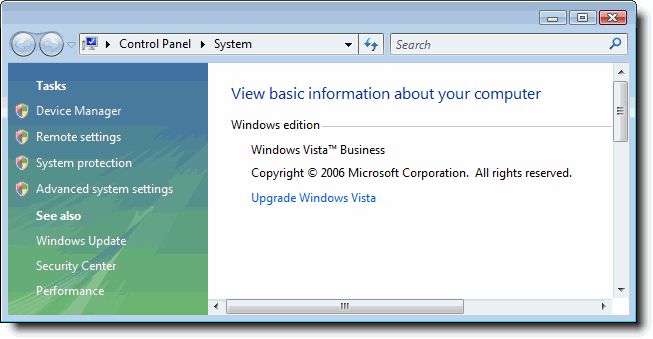
- Click Properties. You will
see the System window, which looks similar to the following graphic:

- In the left-hand column,
click System protection. If
you see a User Account
Control window,
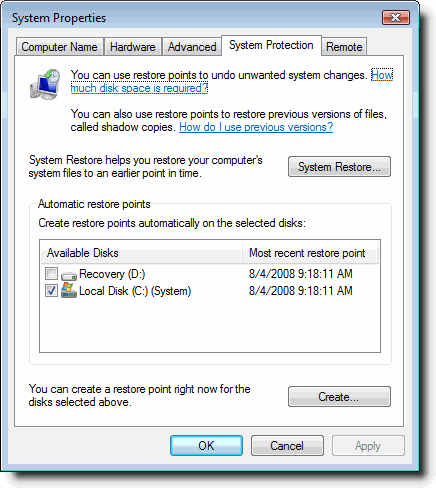
click Continue. You will see
the System
Properties window, which looks
similar to the following graphic:

- Under Automatic restore
points, uncheck Local
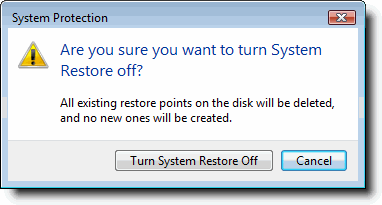
Disk (C:) (System). You will see
the System
Protection window, which looks
similar to the following:

- Click Turn System Restore
Off.
- Click OK.
- Run Disk Cleanup to delete your
temporary files.
- Right-click
the V-shield icon in the
System Tray (in the bottom-right corner
of your screen).
- Click VirusScan Console.
- Right-click Full Scan.
- Click Start.
- VirusScan will take between five
minutes and several hours to scan your
computer, depending on the amount of
data on your computer's drive(s).
VirusScan will not scan encrypted
files. You'll see the
message File not scanned
[The file is encrypted.].
- When the scan is complete, close
VirusScan.
- To be sure that your computer is
clean, restart your computer and follow
steps 2-8 to scan your computer a
second time.
Re-enable System Restore
- Click the Start button.
- Right-click Computer.
- Click Properties. You will
see the System window.
- In the left-hand column,
click System protection.
- Under Automatic restore
points, check Local Disk
(C:) (System). Your screen will
look similar to the one below:

- Click Apply.
- Click OK.
Last updated 2/14/14


 Search for forms & applications.