Welcome to CISC103, a class that is designed to introduce basic concepts of computer science through the window of "web applications".
It has no pre-requisite, so there is no assumption about any previous background with computers, other than that which is common knowledge (e.g. how to use a web browser, a mouse, etc.). So if you are uncomfortable with your computer knowledge, the word of encouragement is for you: the introduction will be gentle.
The word of caution is for everyone: if this initial activity seems really easy, don't be lulled into a false sense of security, or into thinking this class is going to be "cake". The work will get rather challenging very soon. You may breeze through this activity, and perhaps even the first couple of weeks, to find that later material requires a lot more study and careful attention. So develop the habit now of doing each activity carefully and completely, even if you find it simple.
By the end of this lesson, students should be able to
Especially
when there are much nicer tools
like Adobe GoLive, Macromedia Dreamweaver, etc. available!
Using Notepad is very simple, and it is available on every Windows box (just as TextEdit is available on every Macintosh). So, if this is your first encounter with building a web page:
If that's the case, you may experience a bit of frustration working in a much simple environment at first. However, it is very useful and necessary step.
This semester, we want to learn how to use JavaScript to make interactive web pages. This means we can't stay at the level of WYSIWYG editors ("What You See Is What You Get") such as GoLive and Dreamwever. We have to get our hands dirty a little in the details of the HTML code. Doing some "hand coding" exercises will help us get more comfortable with the HTML that GoLive and Dreamweaver create for us.
Eventually, we will migrate to using Dreamweaver, which is available in the lab, but when we do, we'll have a much deeper understanding of what Dreamweaver (or GoLive) is doing for us because we've done some of the hand coding. And, if you don't have Dreamweaver at home, Dreamweaver (and some knowledge of HTML internals) will allow you to move back and forth between hand coding with Notepad (or TextEdit on Mac) when you are at home, and coding with Dreamweaver in the lab, with no troubles.
When you first sit down at a computer, move the mouse slightly to "wake up" the computer, in case a screen saver is operating.
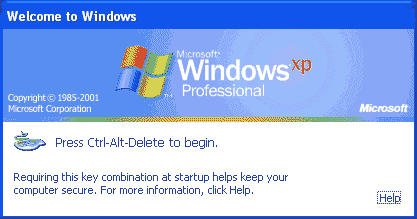
Question 1: Do you see the following?
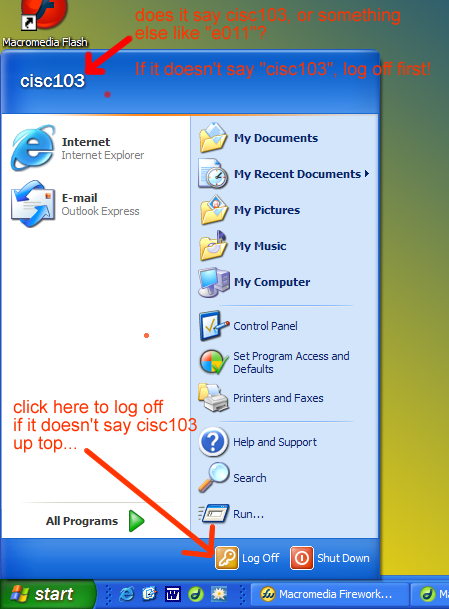
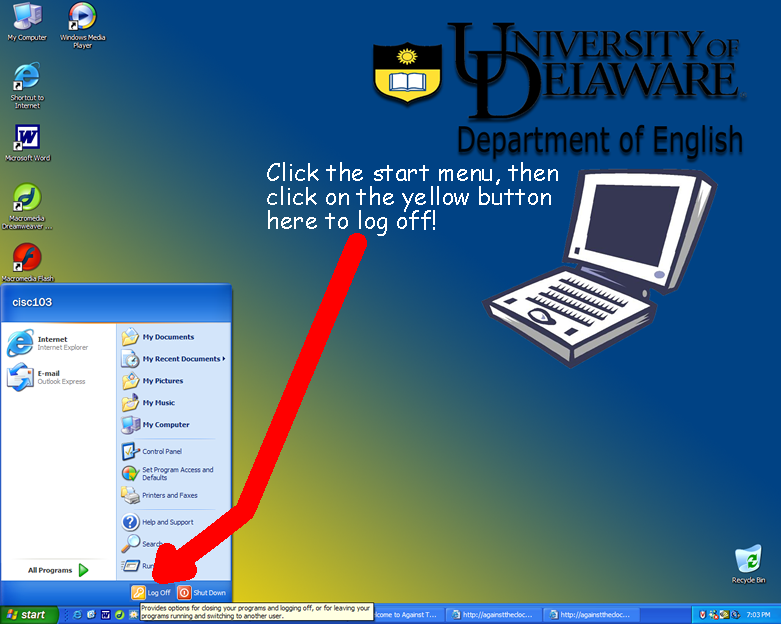
If answer to question 1 is no: instead, you see something else... perhaps the computer is already logged in. If so, you need to be sure that it is logged into cisc103. You can check this by clicking on the "start" menu button, as shown here:
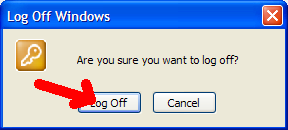
If you aren't logged into cisc103, as shown by looking at the top of the start menu in the image shown at right, then click log off. You may be asked to confirm that you really do want to logoff.
If answer to question 1 is yes:
Then you are ready to log on. To bring up the logon screen, hold down CTRL-ALT-DELETE all at the same time (the so-called "three finger salute").
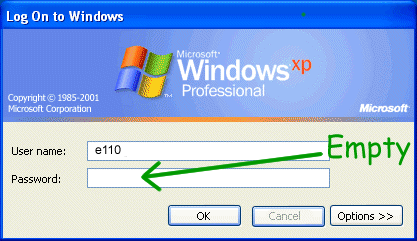
The username for everyone is cisc103, and there is no password (just leave it empty), as shown below:
If you have a screen that looks like this, check what is in the "Log on to:" box as shown:
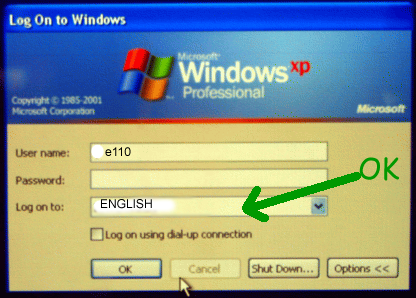
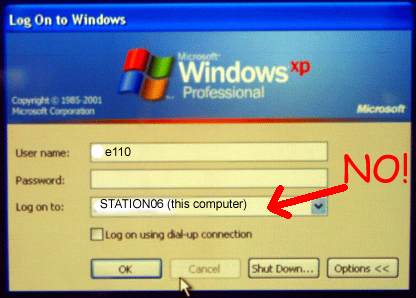
If you have anything in the ":Log on to:" box other than MEMLAB, you need to click on the little grey arrow to the right of the box, and change it to MEMLAB before logging on.
Click OK to continue logging on. You should then see a screen like this one:
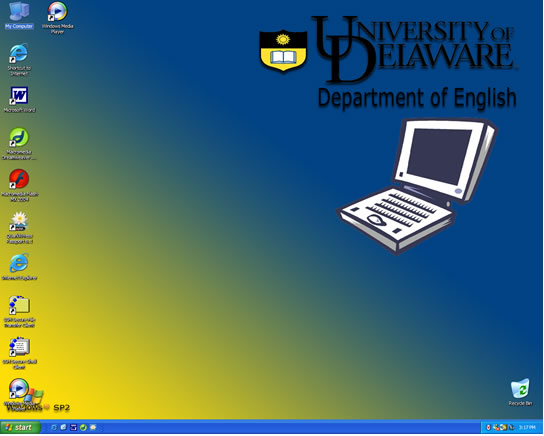
You are ready to proceed to step 2.
Note that if you are working from a paper copy of these instructions, now is the time to switch to the online version. Bring up a web browser, type in the address http://www.udel.edu/CIS/103/pconrad/. Click on the "labs" link, and then on "lab01.html".
In case that doesn't work, the direct link to this file is: http://www.udel.edu/CIS/103/pconrad/06F/labs/lab01.html
Now find the "My computer" icon and double click on it, as indicated in the figures below. That will bring up a window where you should notice the "H drive" somewhere towards the bottom of the screen.

Double click on the H drive icon. That should bring up a window like this one. You should see folders for various folks in the class, including your instructor and your TA, as well as fellow students. Your next task is to create a folder for yourself. This is where you will store things for the course this semester. The next diagram illustrates what to do. The folder will initially come up with a name like "New Folder", or "New Folder (2)". Change the name to your UDEL email address (but without the @udel.edu part), e.g. jsmith, or skibum, or whatever.
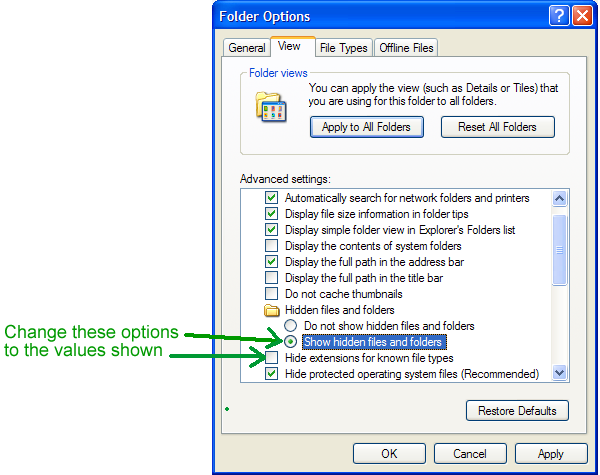
Next, we are going to change a few default options for how Windows treats filenames. Go to the Tools menu at the top of your folder screen, as shown here:

You need to change some of the folder options under the "View" tab, as shown here:
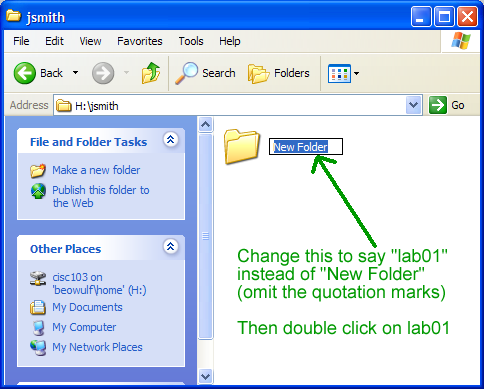
Next, double click on your folder. It should initially be empty. First, create a new folder called "lab01", and then double click on that folder, as shown here:
The folder will f irst come up with a name such as "New Folder", as shown here. Rename your folder to "lab01", then double click on it to go into it.
You should now be inside an "empty folder" called "lab01", which is inside your personal folder on the H drive. You are ready for the next step.
Now right click on "empty space" to bring up a menu where you can select "New Text File", as shown below:
Your screen should then look something like this:
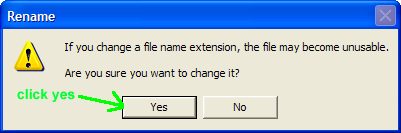
Rename the file to test.html. At first, Windows may "scold" you a bit, as shown below. Go ahead and click "yes", because you are changing this file extension on purpose.
You now have a file called "test.html". We are now going to edit this file with Notepad. It is very important that we are doing this with Notepad, rather than with a more sophisticated editor such as FrontPage, Dreamweaver, or with a word processing program like Microsoft Word. The reason is that we want to start at the very beginning with learning web technologies. Those other sophisticated tools will put in a lot of codes that are advanced, and will be confusing for us at this stage. Eventually, we will move on to those advanced tools. For now, we will use Notepad.
To use Notepad to edit the HTML file, right click, and go to "open with Notepad", as indicated below. If you double click the file will just open the file in Internet Explorer, which is no problem, but it won't allow you to make any changes. At this point, you'll see a blank page, since the file doesn't contain anything yet.
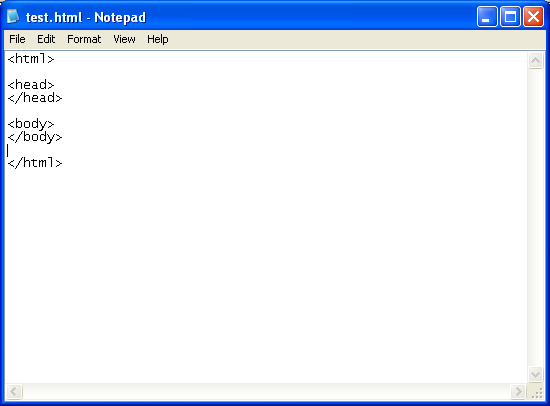
After you open the file with Notepad, you should see a screen like this one, except it will be empty. You are now ready to start creating your first HTML file from scratch. Start with the open tag <html>, and the close tag </html>
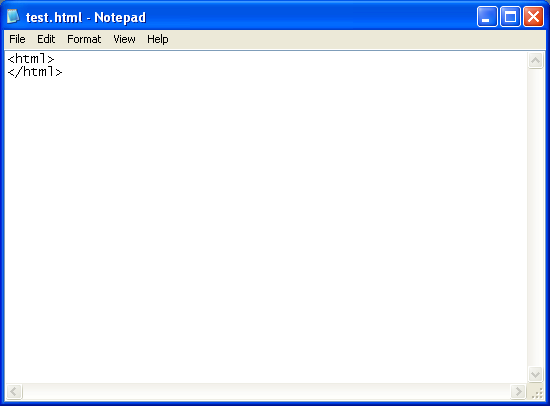
The combination of an open tag <html> and a close tag </html> gives you something called an html element. Now, you are going to nest two elements inside the html element, as shown below. These two elements are the head element and the body element.
Now, continue editing, in the stages shown below.
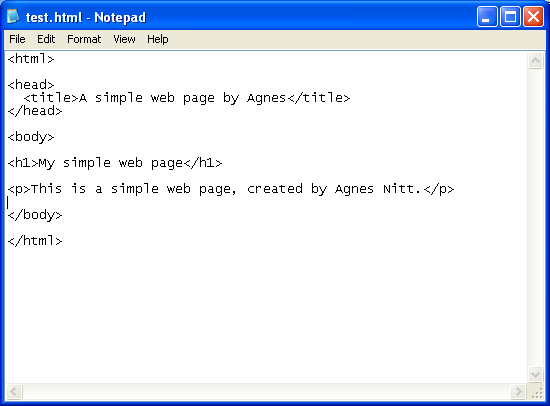
title element, nested inside the head element. This is the first element that will actually contain some content, in this case, the title of our web page. For your content, don't type exactly what I have here. Instead, change it to your own interesting and creative title, one that incorporates the name you would like to be called by in class.h1 element containing a "1st level headline", and p element ("p" stands for "paragraph") inside our body element.
In the p element, include your complete first and last name somewhere in a complete English sentence. Again, the sentence can be something of your own imagination, as long as it contains your name. Don't worry about being profound; this is just meant to be an example.
With the addition of the title, h1 and p elements, we now have a complete web page, built from scratch. It isn't very exciting or visually interesting, but we'll learn how to add some style to it in the coming weeks. Your HTML textbook has lots of information on how to add lots of visual interest to the page.
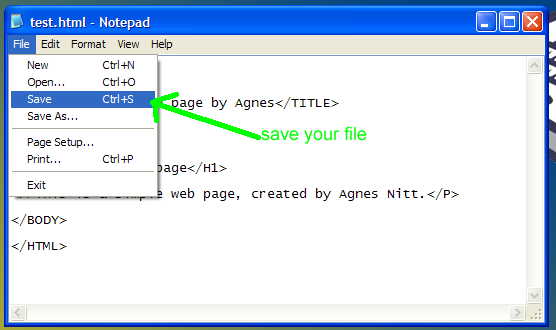
You are then ready to see the finished product in a browser window, as explained in the next step.
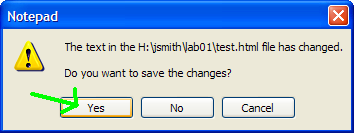
If you forget to save the changes, and try to close the window, you may get this message. If so, click where it says "yes".
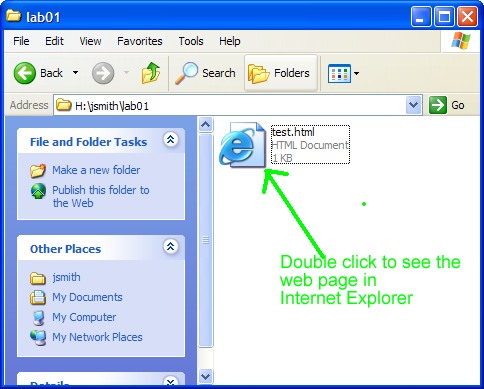
You are now ready to see the results of your creation. Go back to the window where you have the test.html file icon, and double click on it. This will open the file in Internet Explorer.
If your file doesn't come up, or you don't see what you think you should see, ask your TA for help.
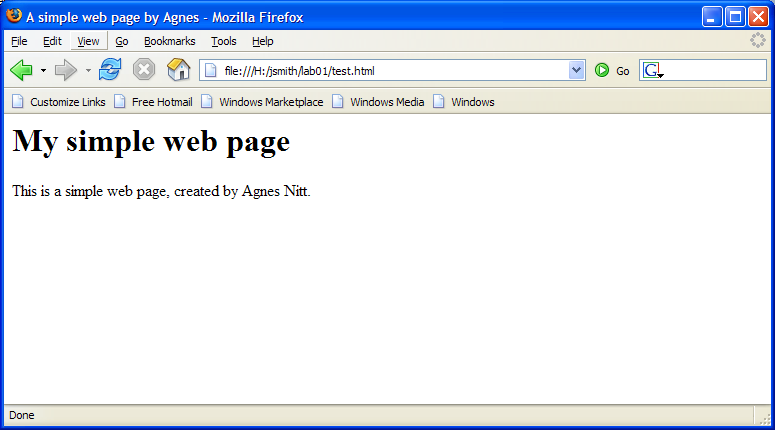
It is helpful, when creating web content, to be sure that it works in more than one browser. Internet Explorer is fairly tolerant of minor errors in HTML code, which is helpful in some ways, but no so good in others. The Firefox browser interprets HTML much more strictly, and checking that the HTML looks correct in Firefox is a good "first step" in checking that our HTML coding is done properly.
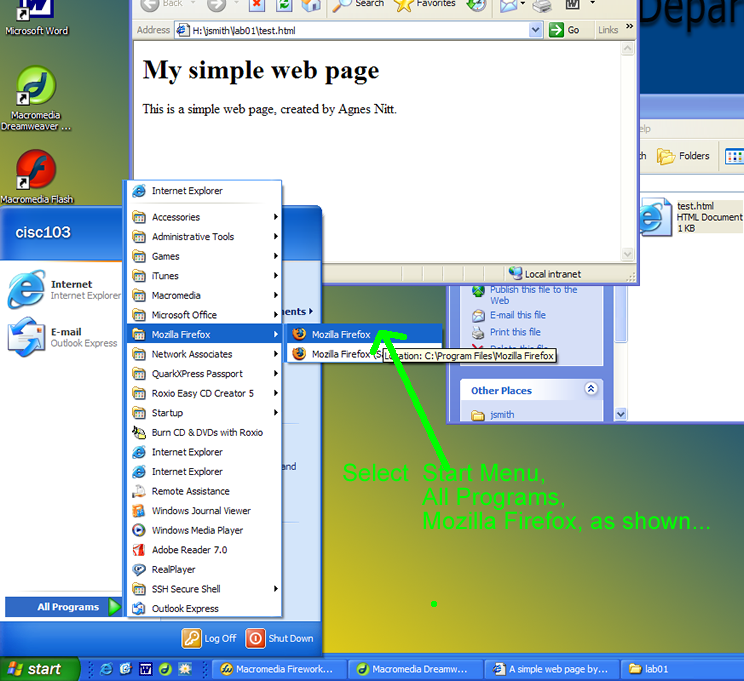
To open the Firefox browser, go to the Start menu, and find "Mozilla Firefox":
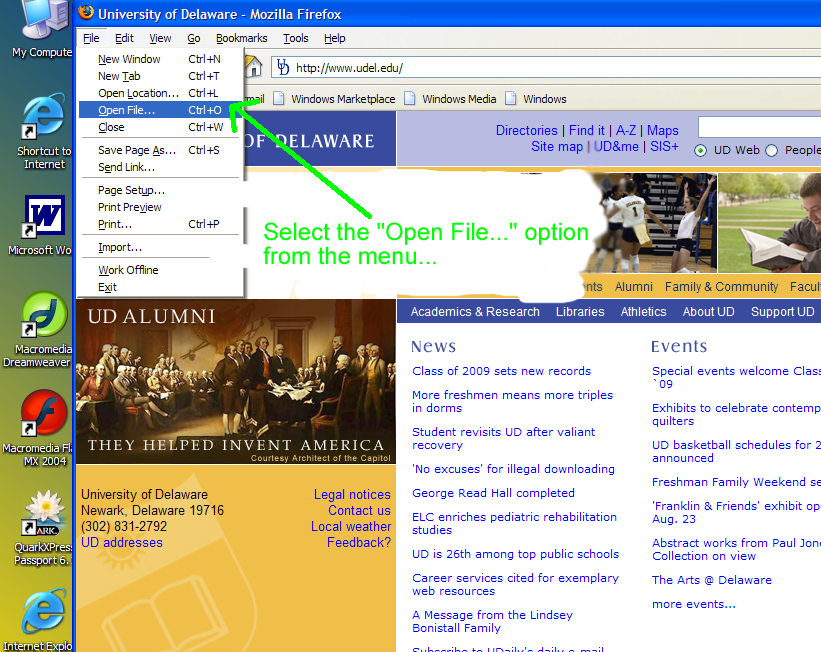
Then, once in Firefox, choose the option "Open File" from the File menu:
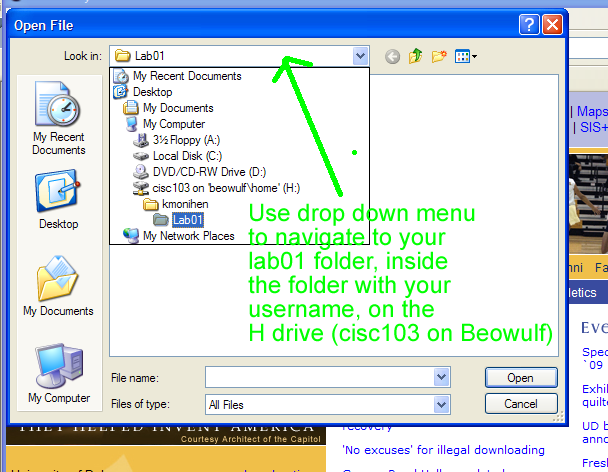
Then, navigate to your lab01 folder inside your folder on the H drive, as shown here:
This should open up your test.html file in Firefox, with a result such as the one below:
There are several steps involved in publishing your web page to the Internet. They involve the use of the SSH Secure File Transfer Client. Your TA or Instructor will demonstrate these on the projector screen.
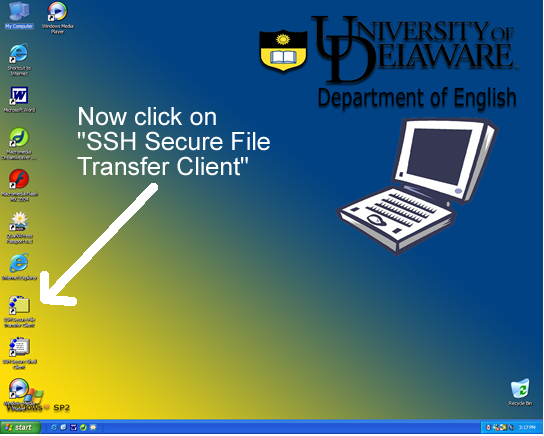
Start up "SSH"/"secure file transfer client".
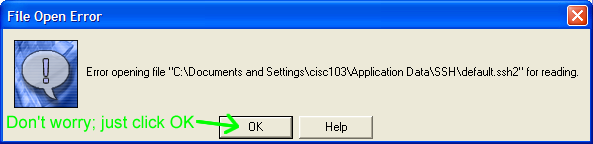
If you get the following error, don't worry about it... you can safely ignore it. Just click "OK".
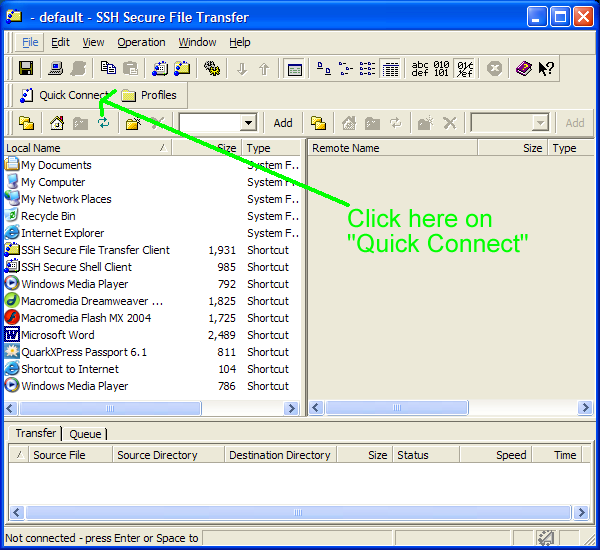
Next, click on "quick connect" as shown below.
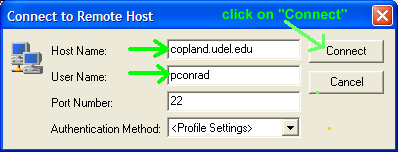
That should bring up the following window. Fill in the values as shown:
Host Name: copland.udel.edu
User Name: [fill in your UD email address without the @udel part]
Leave the other two boxes unchanged, i.e. port number 22, authentication method <profile settings>
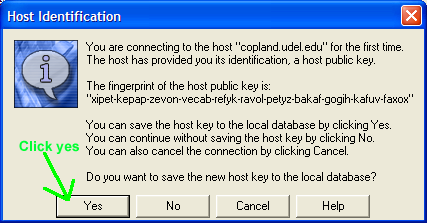
The very first time you do this on a particular computer, you may see the following box show up. Just click "Yes".
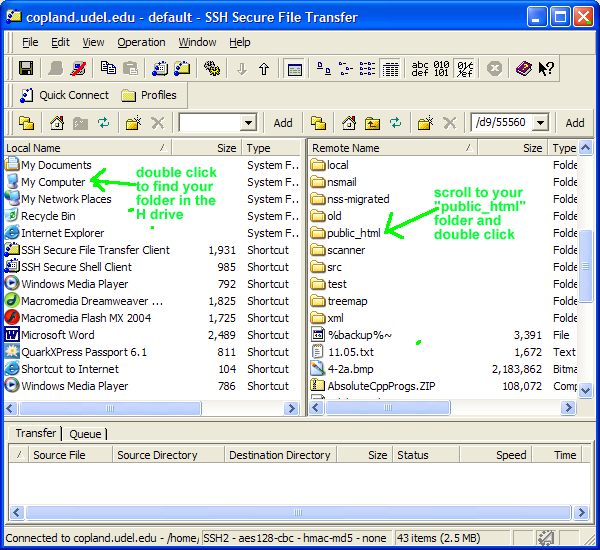
Next, you should see the following screen, with the files on the hard drive in the left window, and your UD
account in the right window.
In the left window navigate to where your files are that you want to put on the web (e.g. in your folder on the H drive.)
In the right window, navigate to the public_html folder. That is the folder where your web files go.
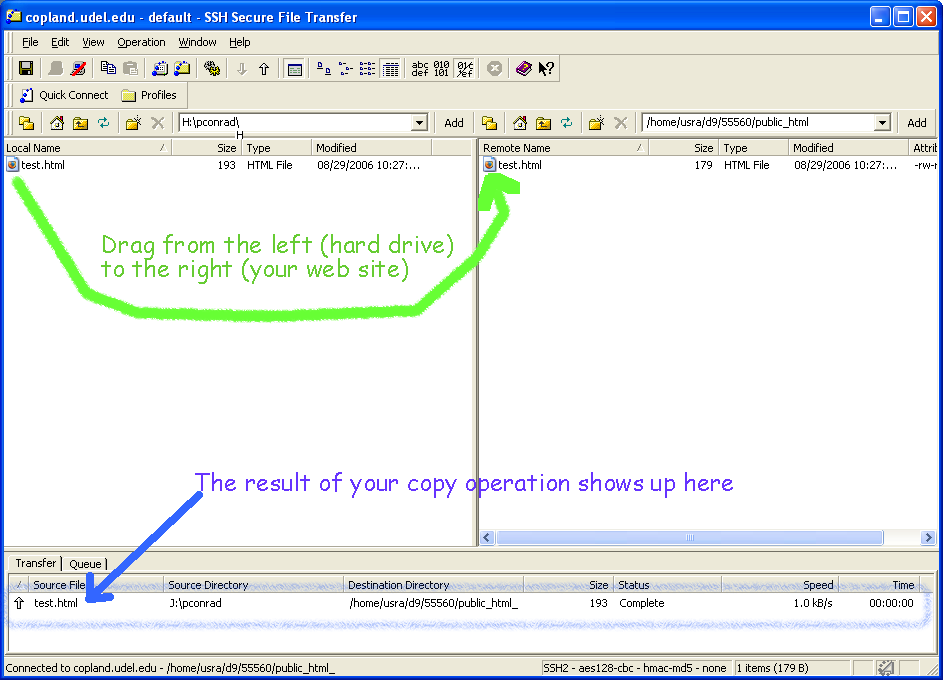
Now the picture should look something like this, with the H drive on the left, and your public_html folder on the right.
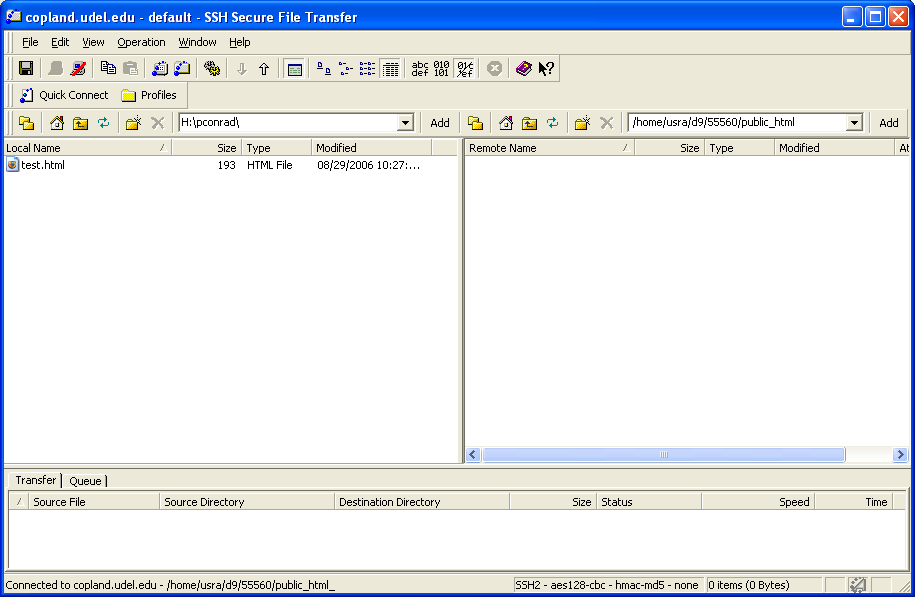
You are ready to drag the file from the left window to the right window. This copies it to your web site on copland.udel.edu.
Now, you want to check the page in your web browser. Use the following web address:
http://copland.udel.edu/~username
where username is your UD email address (without the @udel.edu part). Don't forget the tilde (that's the little squiggle thing, ~, which is often—though not always—at the upper left hand corner of your keyboard.
If you see your web page listed, try clicking on it. Hopefully you see your web content.
Another possibility is that you might get this:
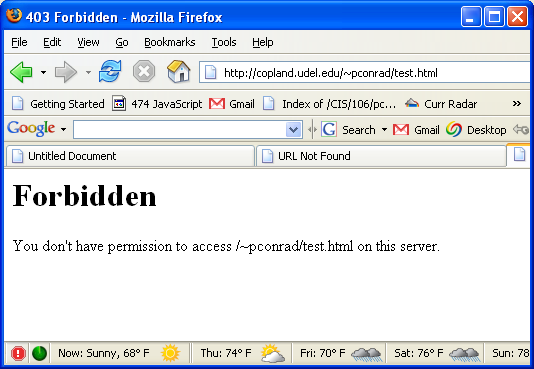
If you get that, the following step will show you how to fix it.
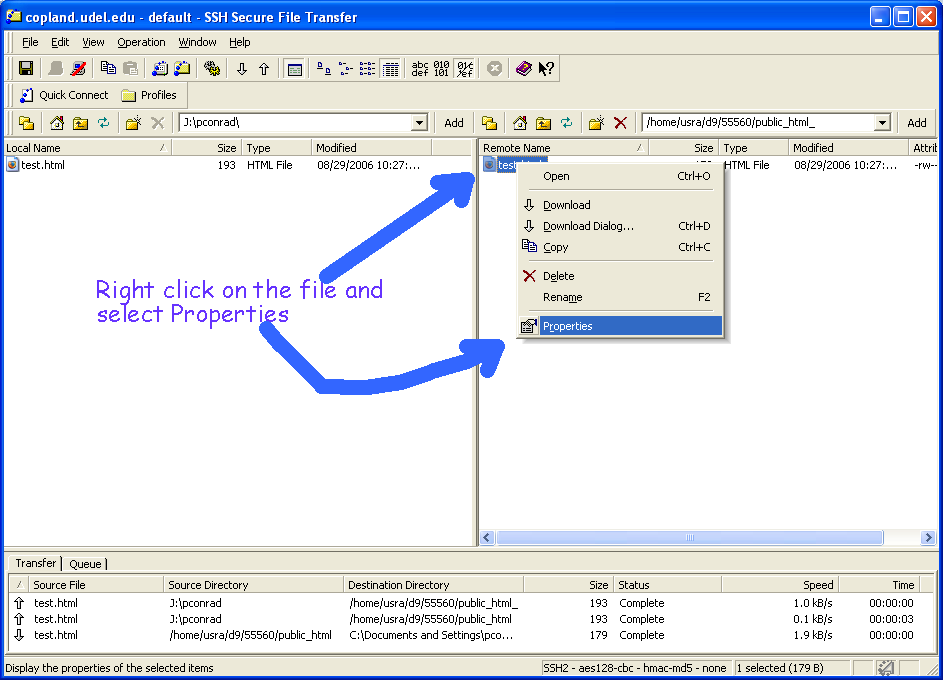
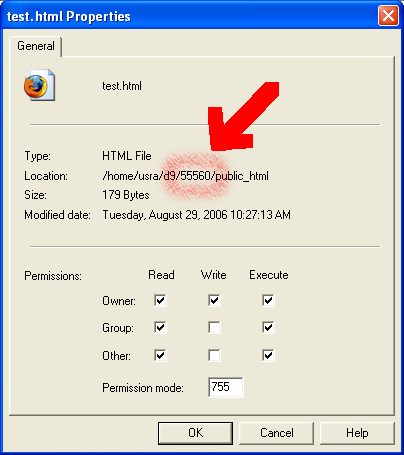
Go back to the Secure File Transfer client. Right click on the file that you are trying to look at, and selecct Properties, as shown:
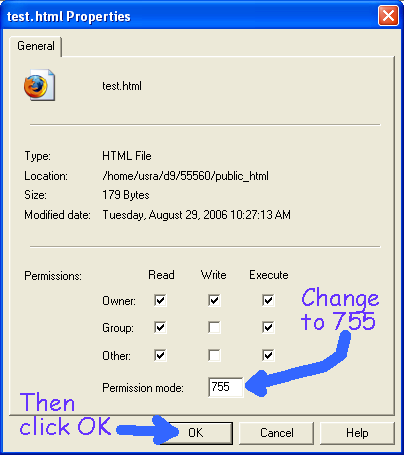
In the window that comes up, change "permission mode" to 755, as shown in the window below. Note that the check boxes change as you do this.
We'll talk about this number 755 and where it comes from in lecture—it is an example of an "Octal Number". The number 755 allows others to see your web page, but not to "write" to it (i.e. they can't change it.)
(By the end of the course, you should be able to explain any of the octal numbers from 000 all the way up to 777, and what permissions they would set on a file on a web server. Don't worry.. this is pretty easy once I show you the trick.)
When you have changed the number to 755, click OK.
Now try your web page again. If you still can't get to it, you might need to set the permissions on your public_html folder, and/or on your home directory. Since it is rare that you will need to do these steps, I'm not going to explain them into detail—instead, ask your TA to walk you through them. I'll just mention what needs to be done, and let your TA show you how to do it. (It turns out to be very similar to what you just did.. in fact, if you are pretty comfortable with computers, you might even be able to figure it out on your own.)
If you did all that, and you still can't see your file on the web, ask your TA for help. If your TA can't figure it out, send email to the instructor, and/or come see your instructor during office hours.
.
Your final step is to be sure that you save all your files, close all your windows, and log off the cisc103 account when you are finished, as shown by the red arrows below.
Specifications for the test.html: file
test.html file should consist of a single html element, that has two nested elements inside it, a head element, and a body element. head element has one element inside it, which is a title element. The title should consist of a short description such as Phill's simple web page. body element should contain at least the following two elements:
h1 element with a headline, and p element with a short sentence. This is a simple web page by Phill Conrad, or Keith Monihen wrote this very simple web page. h1 element should include a suitable headline such as Fred's Simple Web Page.Due date: This is "due" on 09/15/06. However, I'd like you to try to get it done sooner than that... ideally during your first lab period.
There is nothing to "turn in"... we'll just check your page on the web.
Also, due to "drop/add", a general "amnesty" applies to all students for late completion of this lab up through 9/20/06.
Your next step should be to read through the "roman numeral pages", and Chapters 1 and 2 in your Head First HTML book. As you read, you may like to try the examples online. Send me email if I can help in any way, and cc your TA.