Using WebDAV to copy files from WebCT
- Description
- Finding the URL for your WebCT course
- Operating Systems
Description
You can copy files from the File Manager of a WebCT course using the Download option. If you want to copy several files or an entire folder all at once, software called WebDAV can be used to drag files or folders to your local computer.
Several setup steps are required to make your computer treat the the WebCT File Manager folder as another folder on your computer. Once you have set up a particular course or project resource folder using WebDAV, you can drag files and folders to your local computer. Note that these connections are specific to the computer you are using, so if you change computers you will have to set up the connection again.
Finding the URL for your WebCT course
To make the connection between your computer and your WebCT course you will need the web address (URL) for the course.
- Logon to WebCT.
- At the top of the myWebCT page, click WebDAV info.
- Below the title of the course whose files you want to copy
find the line that begins with "Course files" and copy the URL address.
Be sure to include the entire address, including the "https". For
example,
https://mycourses.udel.edu:443/dav/ANSC252_010_07F/
- Logoff WebCT.
Setting up WebDAV for Windows XP
- Double-click the My Network Places icon on your PC desktop to open the Network Places folder.
- Double-click the Add Network Place icon.
- Click Next.
- Click the bottom choice: "Choose another network location."
- Click Next.
-
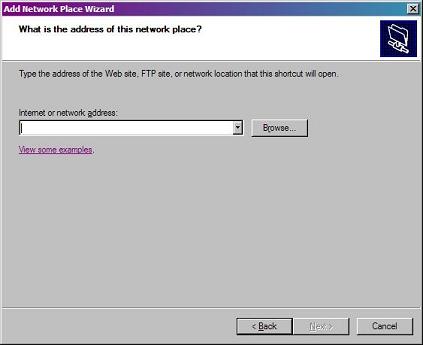
In the "Internet or network address" field, type the URL for the
WebCT course that you copied above.
-
Click Next.
- When asked for your username and password, type your UDelNet ID and password.
-
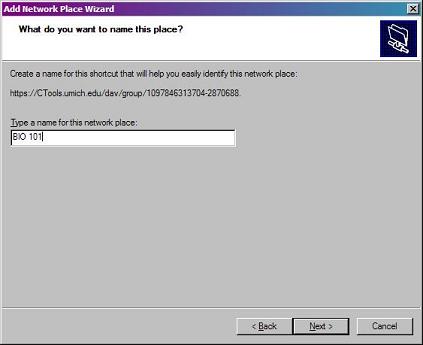
Type a name for the WebCT course. This name is used on your
computer when
referencing the course File Manager folder.
- Click "Finish" to complete the set up.
- When the setup is complete, the webCT course File Manager folder will appear in your My Network Places as a folder. It will also show up under My Network Places in Windows Explorer, where it will act just like any other folder in Windows Explorer.
- You can now drag files and folders to your computer from the File Manager folder for the WebCT course.
Setting up WebDAV for Windows Vista
There are a number of known issues with support for WebDAV in Windows Vista. You may therefore experience difficulties using WebDAV as described below. However, Microsoft has a software update available that may help correct connection problems for some users. For information about the update and how to download it, see article 907306 in the Microsoft knowledge base at http://support.microsoft.com/kb/907306/en-us.
- From the desktop, click Computer.
- Click Map Network Drive.
- On the Map Network Drive screen, click "Connect to a Web site that you can use to store your documents and pictures", and then click Next.
- Click "Choose a custom network location", and then click Next.
- In the "Internet or network address" field, type the URLfor the WebCT course that you copied above, and then click Next.
- When prompted, enter your UDelNet ID and password.
- You can now drag files and folders to your computer from the File Manager folder for the WebCT course.
Setting up WebDAV for Mac (OS 10.4:'Tiger' and 10.5:'Leopard')
- From the Finder, select "Go" from the menu bar and then select "Connect to Server..."
- In the resulting dialog box, type the URL for the WebCT course that you copied above.
- Press the "+" button to save this path (URL) for future use.
- Click "Connect."
- Type your UDelNet ID and password and click "OK"
- You will now see a window on your Macintosh screen that represents the File Manager for the WebCT course. You can now drag and drop files from this window and delete files by dragging them to the Trash.
Setting up WebDAV for Mac (OS 10.0 - 10.3)
-
Download the Goliath WebDav client at:
http://www.webdav.org/goliath/#download - Decompress the file and double-click on the .dmg file. (Depending on your version and configuration of Stuffit, the disk image may automatically mount.)
-
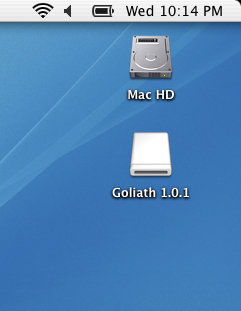
A disk image named "Goliath 1.0" should now be available. Simply
drag and drop the Goliath folder contained
within in the disk image to your hard disk.
- Open the Goliath application. It will probably be in your Applications folder.
- In the WebDav Connection dialog box, type the URL for the WebCT course that you copied above.
- Type your UDelNet ID and password.
- Click the Advanced settings tab and check the box next to "Disable Encoding of Macintosh Recourse."
- Click "OK."
- You will now see a window on your Mac screen that represents the File Manager for the WebCT course. You can now drag and drop files from this window or use the "Web" menu to download files.