To password protect an account on Mac OS X 10.5 (Leopard) or Mac OS X 10.6 (Snow Leopard), follow these steps:
- From the Apple menu, click System Preferences.
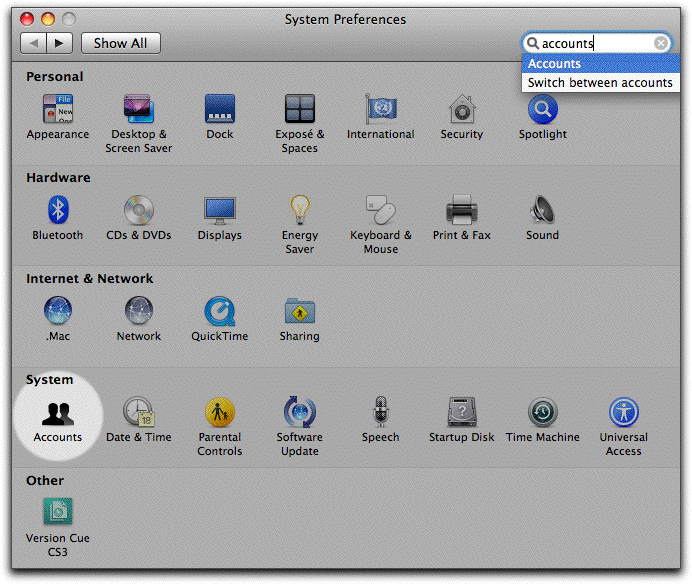
- In the System Preferences window, click the Accounts icon
in the fourth row. This icon is circled in white in the following graphic:
- You will see the Accounts window, which should look similar to the following:
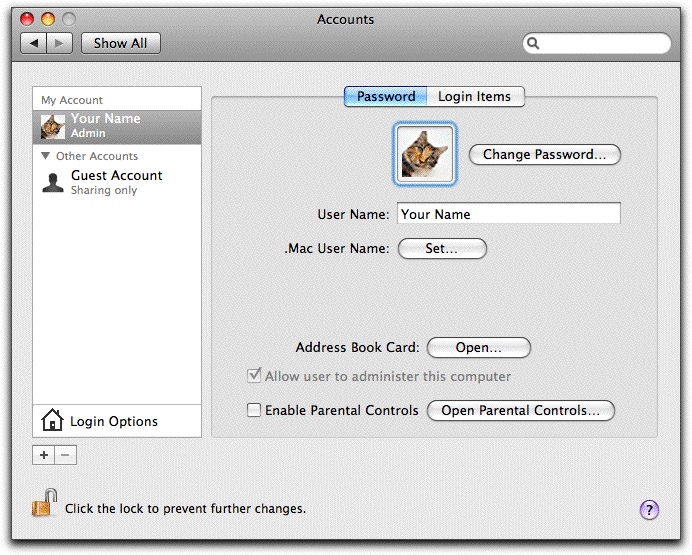
- If the lock icon in the lower-left hand side of the window is locked, click it to unlock it.
- In the left-hand column of the window, click the name of the account you want to modify.
- Click Change Password on the right-hand side of the window (the the right of the graphic--in this case, a cat).
- The Accounts windows should now look similar to the following:
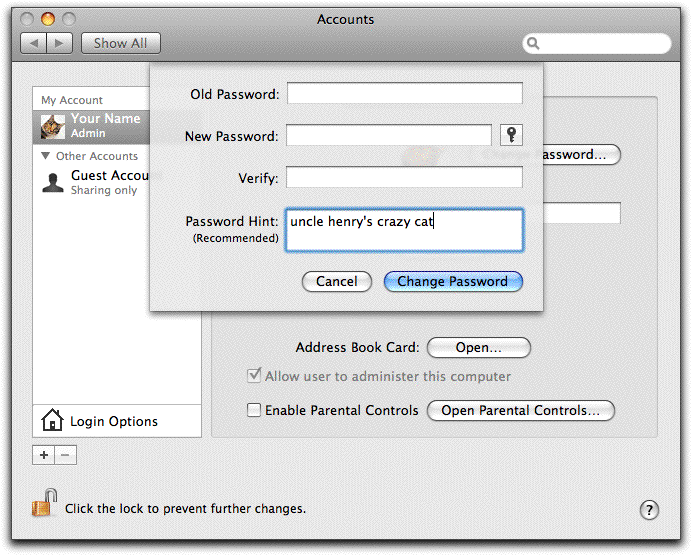
- In the Old Password field, type the old password.
- Press TAB.
- In the New Password field, type the new password.
- Press TAB.
- In the Verify field, retype the new password.
- Press TAB.
- In the Password Hint field, type a hint for the new password (optional).
- Click Change Password.
- If you want to change the password for another account, click on its name in the left-hand column and follow steps 5-14.
- At the bottom of the left-hand column of the window, click Login Options.
- Confirm that Automatic login reads Disabled (OS X 10.5) or Off (OS X 10.6).
- Click the lock in the lower-left corner of the window to prevent further changes. The Accounts window should now look similar to the following:

NOTE
If you want to make changes to these options in the future, you must click the lock in the lower-left corner of the window and type the Admin password to unlock the
page to access these options. |

