Using X-windows (X11) and secure shell (SSH) to connect to a remote UNIX server (host)
X-windows (X11) and SSH software let you run certain types of software on a remote UNIX server
(host) while displaying and controlling the software's graphical user interface (GUI) on your
local desktop system.
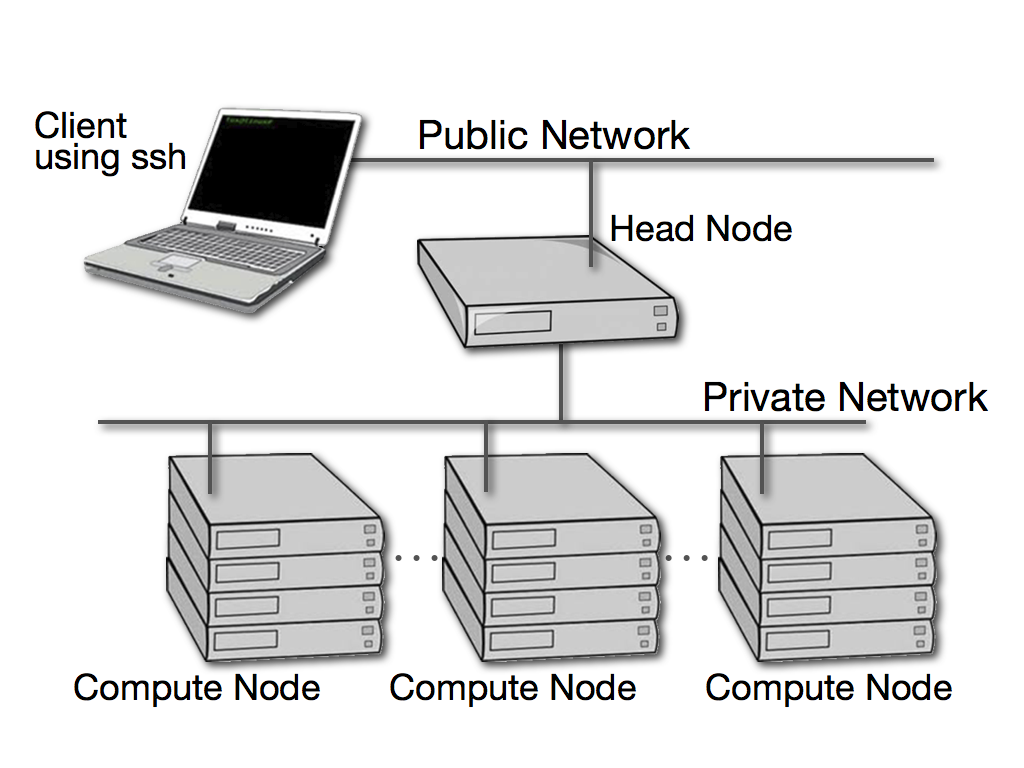
In a cluster computing environment, X11 and SSH are typically used to connect to the cluster's
head node as illustrated below.
This document tells you how to get started with X11 and SSH on local Windows desktop systems.
Windows desktop use
Windows users must:
(1) Install a secure shell program (SSH) to establish a remote
connection.
(2) Install an X-Windows server program.
(3) Generate a public/private key pair.
We strongly recommend PuTTY for the SSH program
and Xming for the X-Windows server program. To use PuTTY effectively and securely, we also recommend
that you set up your public/private key pair (digital identity) to use with all remote host connections..
PuTTY installation
-
Download PuTTY Installation package. Look for the
file named putty-x.xx-installer.msi
(e.g., putty-0.76-installer.msi).
- Double-click the downloaded putty-x.xx-installer.msi file to begin the
PuTTY installation. If prompted by the firewall, click Unblock.
- Follow the recommended (default) choices except for the following:
- At Completing the PuTTY Setup Wizard, clear the View README.txt check box before clicking Finish.
Xming installation
- At the Xming
distribution site, download and save the latest versions of Xming and
the Xming-fonts. Look for the files named Xming-x-x-x-x-setup.exe
(e.g., Xming-6-9-0-31-setup.exe) and Xming-fonts-x-x-x-x-setup.exe
(e.g., Xming-fonts-7-5-0-70-setup.exe).
- Double-click the downloaded Xming-x-x-x-x-setup.exe file to begin the Xming
installation. If prompted by the firewall, click Unblock.
- Follow the recommended (default) choices except for the following:
- At Select Components, select
Don't install an SSH client
- At Select Additional Tasks, select
Create a desktop icon for Xming
and
Create a Quick Launch icon for Xming.
- At Completing the Xming Setup Wizard,
uncheck
Launch Xming before clicking Finish.
- Double-click the downloaded
Xming-fonts-x-x-x-x-setup.exe file to begin the Xming fonts installation.
- Follow the recommended (default) choices with one exception:
- At Select Components, select all of the listed fonts.
Generate your public/private key in PuTTY
- Click PuTTYgen in the All Programs\PuTTY
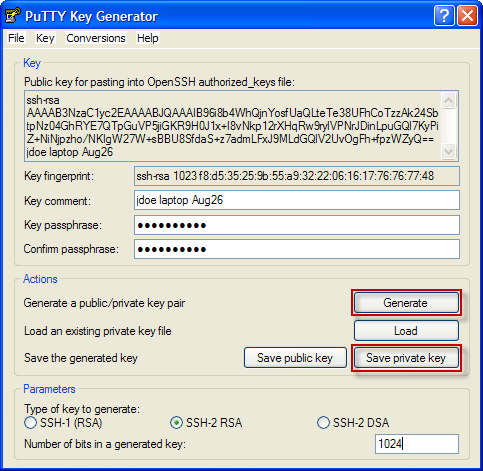
folder to start PuTTYgen and display the PuTTY Key Generator window.
- Click
Generate
to generate a public/private key pair. You must move the mouse around in the
empty area of the PuTTY Key Generator window to add randomness to the key. (This will take a few seconds.)
- The Key comment will appear as a hint whenever you are prompted for the
passphrase for this key.
- Change the value in the Key comment text box to a more meaningful hint (e.g. Windows desktop system name and
date).
- Type an easy-to-remember phrase for this private key in the Key passphrase text box.
- Type the same phrase in the Confirm passphrase text box.
-
Click
Save private key
- Change the location to your desktop and type a file name to associate with your Key comment (e.g., jdoe).
- Close the PuTTY Key Generator window by clicking the X in the upper-right corner.
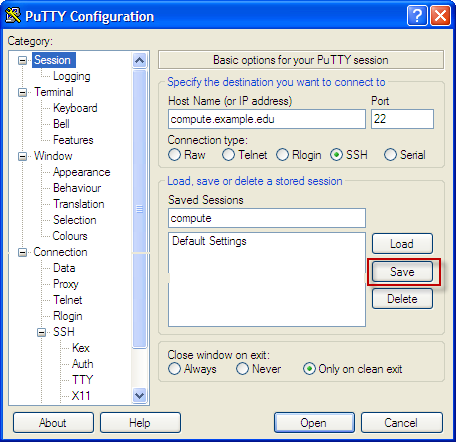
Configure PuTTY for remote host connections
 Double-click the PuTTY desktop icon
to open the PuTTY Configuration window.
For each remote host name (e.g., compute.example.edu),
create a saved session name (e.g., compute) and then define and
save its configuration settings as described below.
Double-click the PuTTY desktop icon
to open the PuTTY Configuration window.
For each remote host name (e.g., compute.example.edu),
create a saved session name (e.g., compute) and then define and
save its configuration settings as described below.
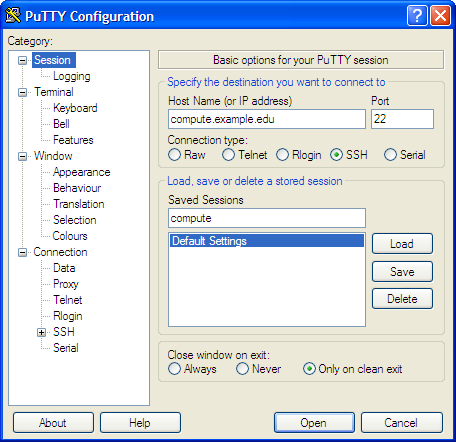
- Click
Session.
- Type the remote Host Name (or IP address)
(compute.example.edu) and Saved Sessions name (compute)
for this saved session.
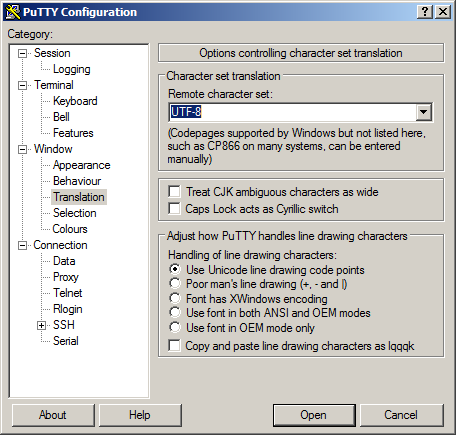
- Click
Window
then click
Translation.
- In the Translation window:
Under Character set translation, change Remote character set:
to UTF-8 from the pull-down menu.
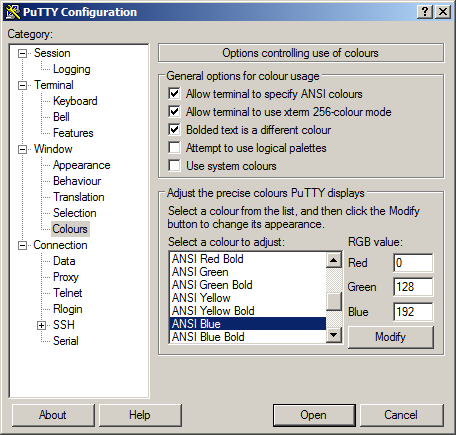
- Click
Window
then click
Colours.
- In the Colours window:
Under Select a colour to adjust: use the scroll bar and click on
ANSI Blue. Change RGB value: for Green to 128 and Blue to 192.
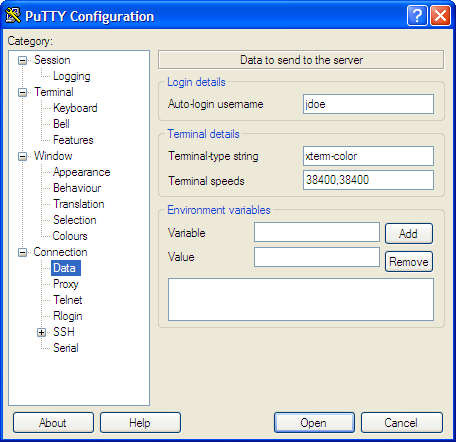
- Click
Connection
then click
Data.
- In the Data window:
- Under Login details, type your compute.example.edu
username (e.g., jdoe) in the Auto-login username text box.
-
Under Terminal details, change Terminal-type string
from xterm to xterm-color.
Note: If the remote
host name is copland.udel.edu or strauss.udel.edu
keep the Terminal-type string as xterm.
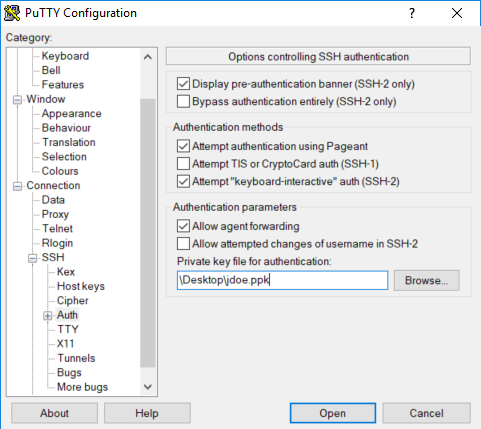
- Click Connection then double-click SSH and click Auth.
- In the Authentication window:
- Under Authentication parameters, select the Allow agent forwarding check box.
- Click Browse... and select the private key file
you just created and saved on your desktop (e.g. jdoe.ppk).
Important Note: Since PuTTY 0.78, the location to enter the Private key file for authentication has been moved to a sub entry under Auth in the panel hierarchy, so click Auth then click Credentials to browse and select the private key file.
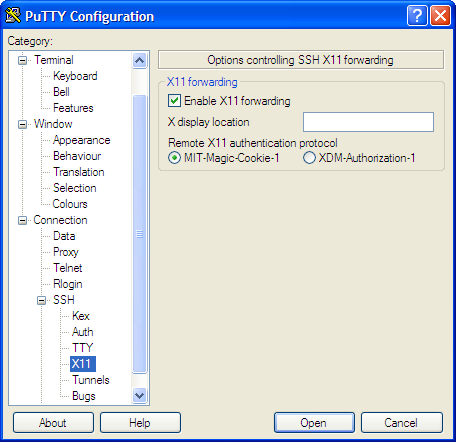
- Click X11.
In the SSH X11 forwarding options window:
Under
X11 forwarding,
select the Enable X11 forwarding check box.
- Click Session again and click the Save button to save the session
configuration named compute.
- You may repeat this series of steps to create saved sessions for other remote host connections. Or you may return later to define them.
- Close the PuTTY Configuration window by clicking the X in the upper-right corner.
Configure a trusted connection for remote hosts
Your local Windows desktop system is now installed with an SSH program (PuTTY), an X-windows server program
(Xming) and public/private key icon (e.g. jdoe.ppk). You also have configured a remote host connection in a saved session (e.g. compute)
with
host name and login details (e.g. compute.example.edu and jdoe). To complete the process, you need to exchange keys
to allow a trusted connection from your Windows desktop system to this saved session.
 Double-click the public/private key desktop icon (e.g., jdoe.ppk)
to start Pageant and display the Pageant: Enter Passphrase window. Type the
passphase for the key comment (e.g. jdoe laptop Aug26) and click OK.
Double-click the public/private key desktop icon (e.g., jdoe.ppk)
to start Pageant and display the Pageant: Enter Passphrase window. Type the
passphase for the key comment (e.g. jdoe laptop Aug26) and click OK.
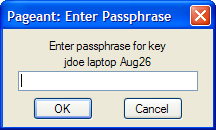
Note: The Pageant: Enter Passphrase window may not be displayed if you have already successfully entered the passphrase during the current login session.
Pageant is running if you see the Pageant icon in the taskbar.

-
To make your first connection,
double-click the PuTTY desktop icon to start PuTTY and display the
PuTTY Configuration window, then
double-click the saved session (e.g. compute).
Click Yes in the PuTTY Security Alert window.
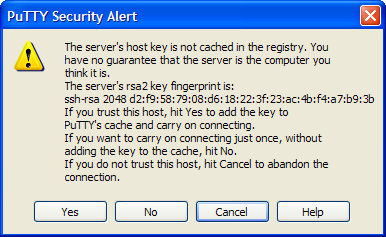
Note: The PuTTY Security Alert window may not be displayed if you previously clicked Yes for the same remote host.
- The PuTTY window will be displayed with a message Access denied,
followed by a prompt for the password for your username (e.g, jdoe) for the
remote host (e.g., compute.example.edu). Follow
the prompts and enter your responses as shown in the table below:
| Prompt | Action |
|---|
| jdoe@compute.example.edu's password: |
Type the password for jdoe on compute.example.edu
Note: What you type will not be displayed on the screen. |
| [jdoe@compute ~]$ |
Type ssh-add -L >> .ssh/authorized_keys |
The following sample session displays all the messages, prompts, and responses for the username jdoe on the remote host centos.css.udel.edu.

If you see an error .ssh/authorized_keys: No such file or directory similar to the one shown below,
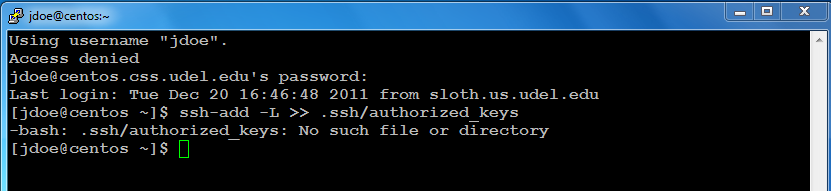
follow the prompts and type your responses as shown below. Otherwise, proceed to step 4.
| Prompt | Action |
|---|
| [jdoe@compute ~]$ |
Type ssh-keygen -C "key comment"
e.g. key comment=jdoe compute Aug26 |
| Enter file in which to save the key (/home/jdoe/.ssh/id_rsa): |
Press return to accept the default key file name shown in parentheses |
| Enter passphrase: |
Press return |
| Enter same passphrase again: |
Press return |
| [jdoe@compute ~]$ |
Type ssh-add -L >> .ssh/authorized_keys |
- Close the remote server window by typing the command exit.
- You may repeat steps two and three to configure a trusted connection for other saved sessions. Or you may return later to configure them.
Using PuTTY and Xming
-
 Double-click the Xming desktop
icon to
start the X-windows server. The Xming server is running if you
see the Xming icon in the taskbar.
Double-click the Xming desktop
icon to
start the X-windows server. The Xming server is running if you
see the Xming icon in the taskbar.

-

- Double-click the public/private
key desktop icon to start Pageant.
The Pageant: Enter Passphrase window
will only be displayed if you have not successfully entered the passphrase during the current login session.
-
Double-click the PuTTY desktop
icon to start PuTTY and display the PuTTY Configuration window. Double-click the saved session for the remote host you want to make a trusted connection.
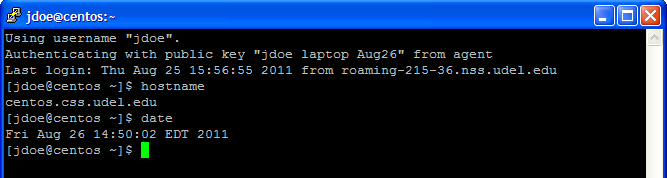
Note: hostname and date are two UNIX commands executed
on the remote host centos.css.udel.edu.
-
Repeat step four to make additional connections to the same remote host on your Windows desktop system. If you have other saved
sessions configured with a trusted connection, you automatically connect to them as well.
-
Test the configuration by typing the UNIX command
xclock -bg green &
A green xclock window should appear. Close it by clicking the
X in the clock's upper-right corner.

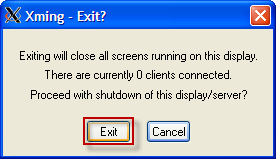
 When you no longer need Xming, right-click the
Xming icon in the taskbar and click
Exit. Then click Exit again in
the Xming - Exit? window. This will close all X-windows
and running applications.
When you no longer need Xming, right-click the
Xming icon in the taskbar and click
Exit. Then click Exit again in
the Xming - Exit? window. This will close all X-windows
and running applications.
Helpful Tips
-
To copy and paste
from one PuTTY window to another PuTTY window.
- Select the text you want to copy in the source window.
- Right-click in the destination window, to have the text inserted at the cursor.
-
Pageant is running if you see the Pageant icon in the taskbar.
-
Right-click the
Pagent icon in the taskbar and click
View Keys. The keys listed in the Pagent Key List window should be
the same as the keys listed if you type ssh-add -l
on the remote host.
-
When you no longer need Pageant, right-click the
Pagent icon in the taskbar and click
Exit. This will stop Pageant, but not close your current remote host connections. Remember to double-click the public/private key desktop icon to display the Pageant: Enter Passphrase window before you start a new remote host connection.

